serving hattiesburg and the surrounding area.
(columbia, petal, purvis, sumrall, laurel, USM, jcjc, jones county, lamar county, forrest county)
serving hattiesburg and the surrounding area.
(columbia, petal, purvis, sumrall, laurel, USM, jcjc, jones county, lamar county, forrest county)
nice dude contacted me from another state. had read about some stuff i do and wanted to talk to me about his computer. he had apparently been doing some research into his situation. the computer worked, but was not lighting up – his backlight was out and needed a repair. he could shine a light into the apple logo from the outside in and make out that the screen was still functioning, just wasn’t lit up. he knew about the “P” fuse and had even contemplated about letting his wife attempt to try out her soldering skills on this motherboard.
after finding out the year, i let him know that historically, after 2012, it’s almost never the “P” fuse. according to some guru’s i follow, apple corrected it’s weak link and it doesn’t seem to be a typical failure point in years following. what we had here was a 2013 13″ macbook pro a1502.
i sent him my agreement to sign and he shipped me the computer. always nervous about what i’m about to uncover, i open the bottom cover.
whoa…. this is one of the fuzziest macbook’s that i have ever seen when looking under the proverbial computer “hood”. a real giant dust bunny found it’s way inside this computer.
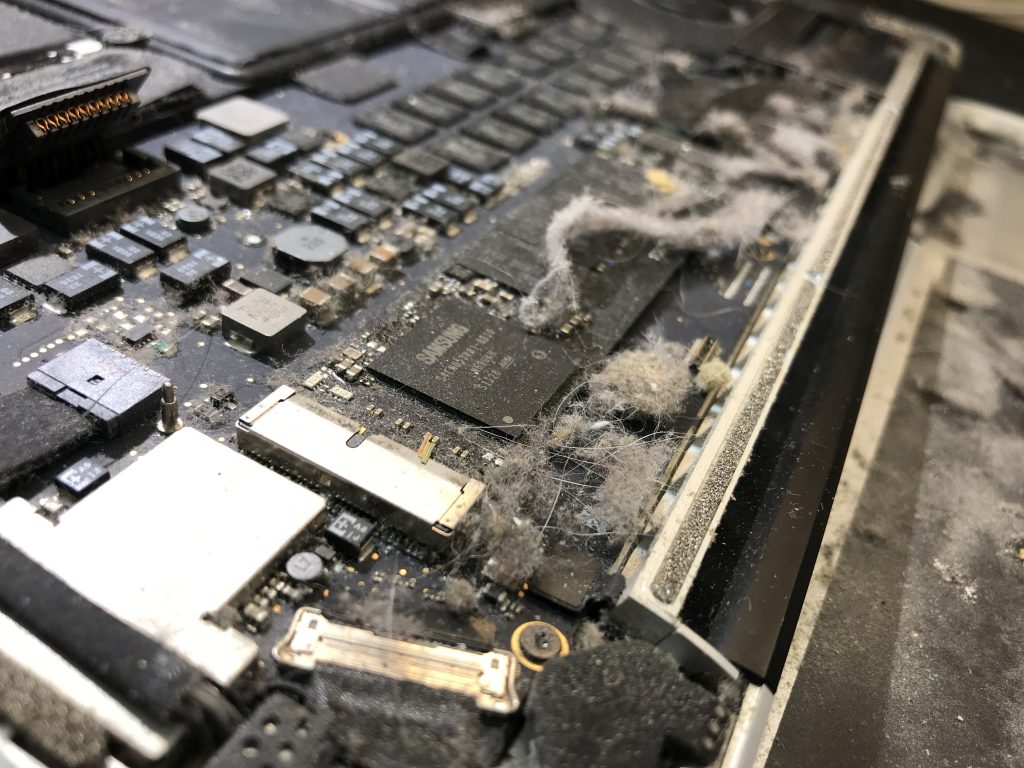
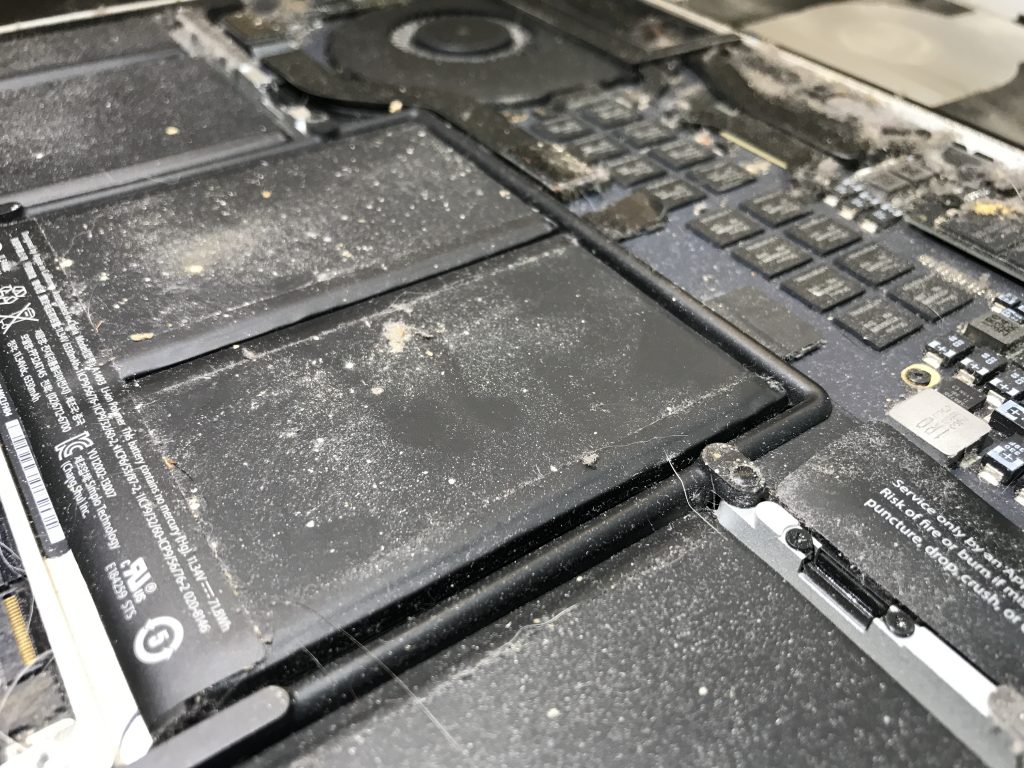
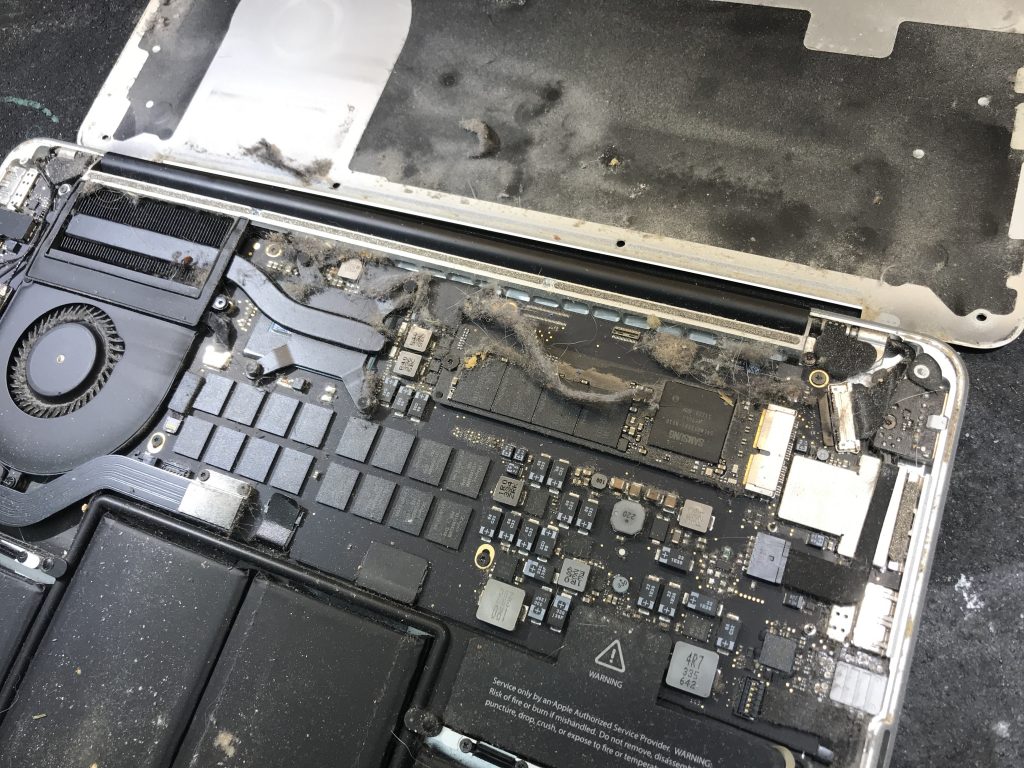
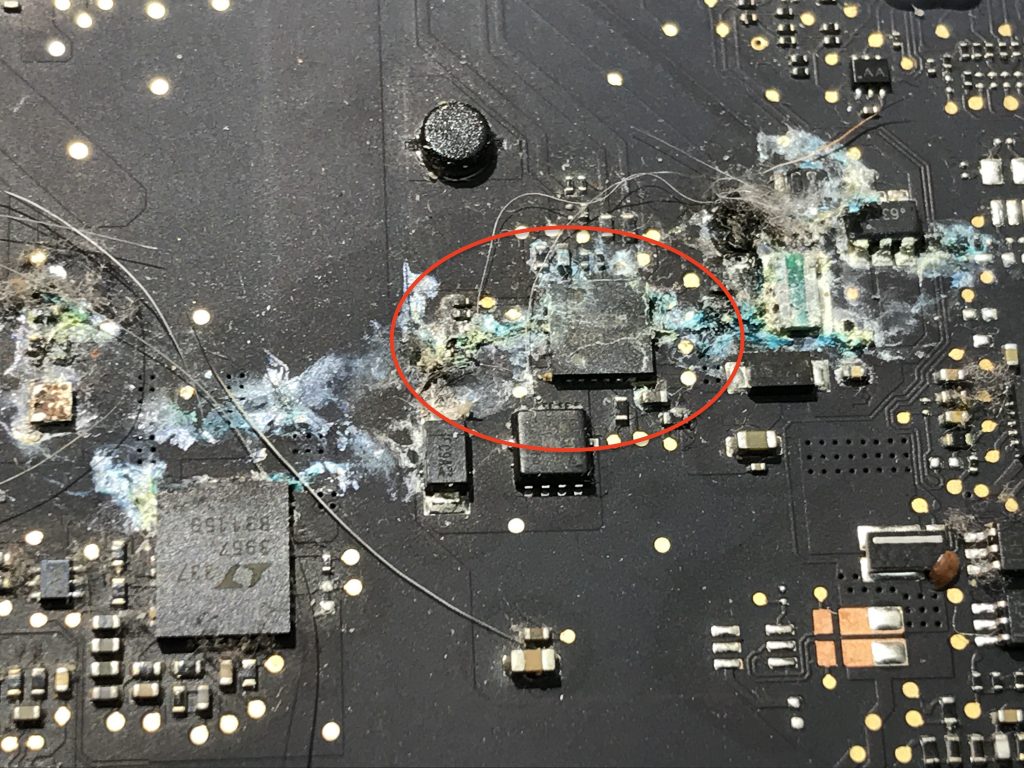
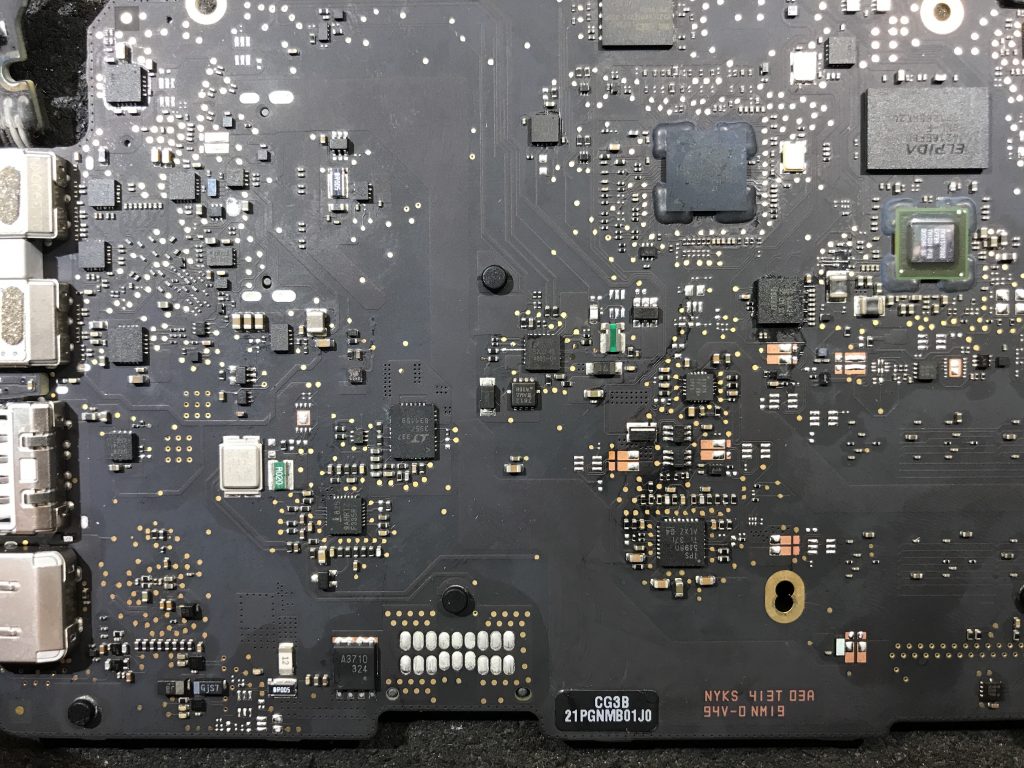
and that was just what i found on one side of the motherboard. pulling the board (820-3476-a) and flipping it over, i also find that it is heavily liquid damaged. it had been exposed to some sort of liquid, some time ago and was well on it’s journey in the process of corrosion, and in need of a deep cleaning and some microscope work.
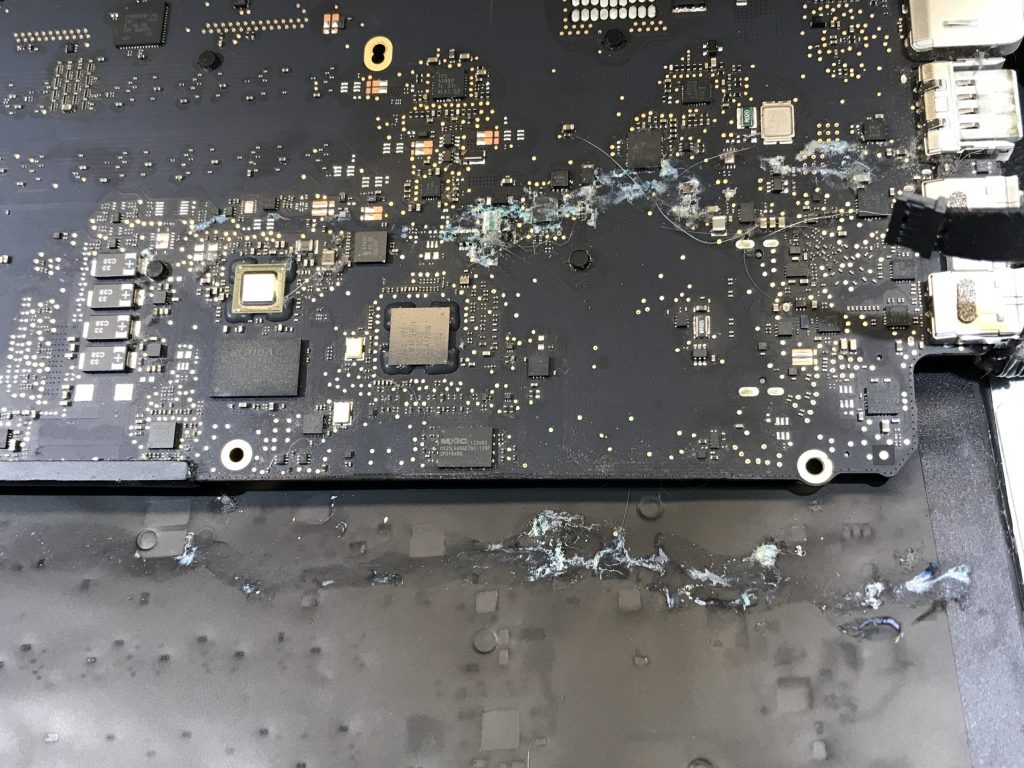
i didn’t know it yet – but the trouble area would be in the red circled area. for all i knew – the entire “river” of corrosion could have knocked out any number of parts along it’s path.
so i begin the process of cleaning and removing and neutralizing the corrosion path. and start the process of looking at the backlight pathway. what is getting power and what is not getting power and where does it stop. several obviously damaged components get replaced and i’m still having trouble with the backlight not functioning at all. i don’t like to willy nilly just go about replacing components, but eventually, you have to dig deeper to find a solution.
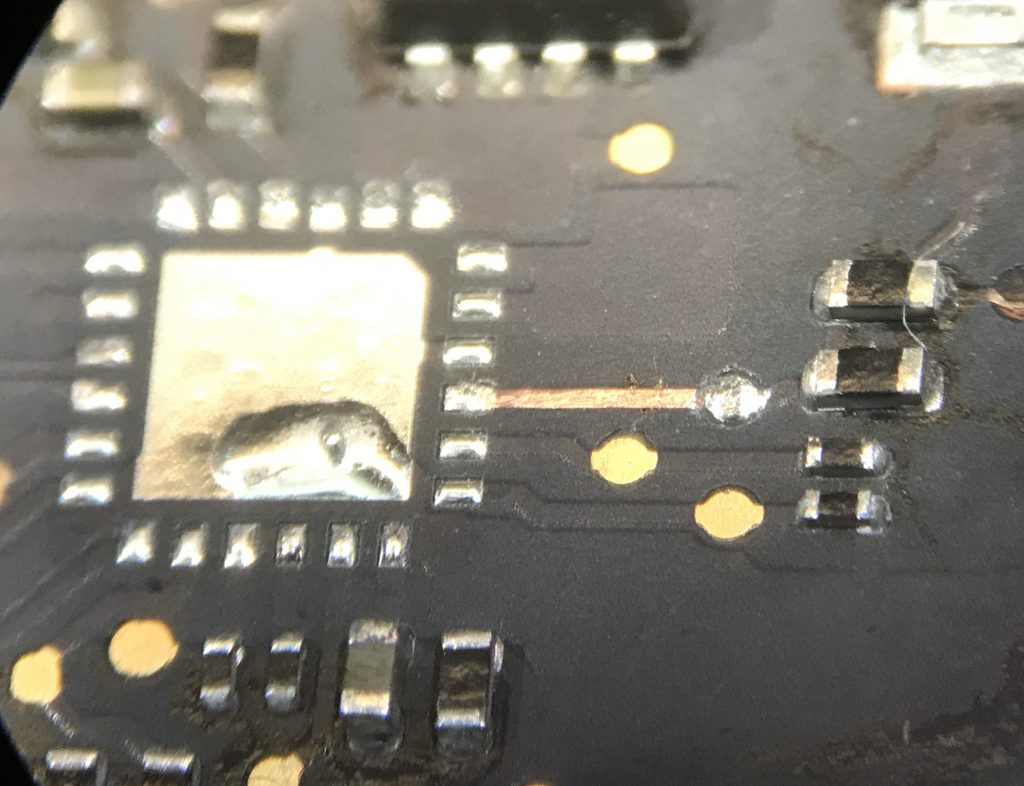
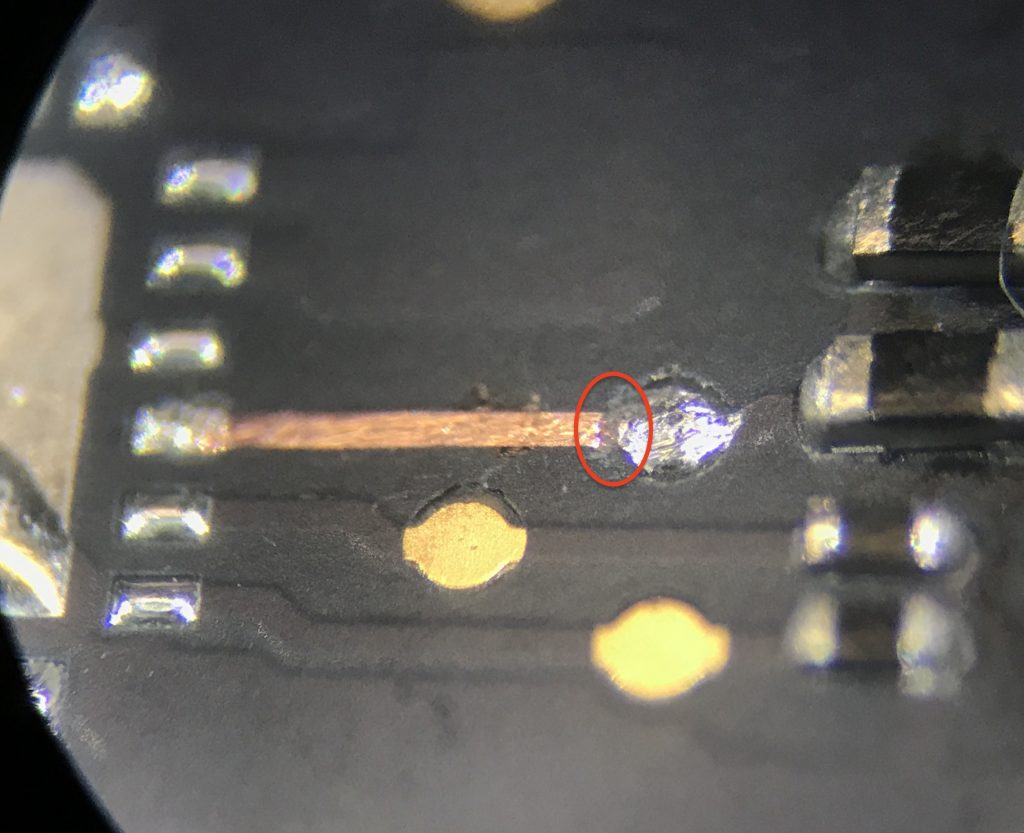
so my next step was to remove the backlight driver LP8548B1SQ-04 – the small QFN24 (4 x 4 x 0.8 mm). with it removed i test all the traces (24 of them) to their respective components and find that one trace is not showing continuity – in otherwords, the trace or line is broken. this would be the trace from pin 21 of the QFN to R7732 and after scraping the entire trace, i find that it is broken riiiiiiiiight at the test point.
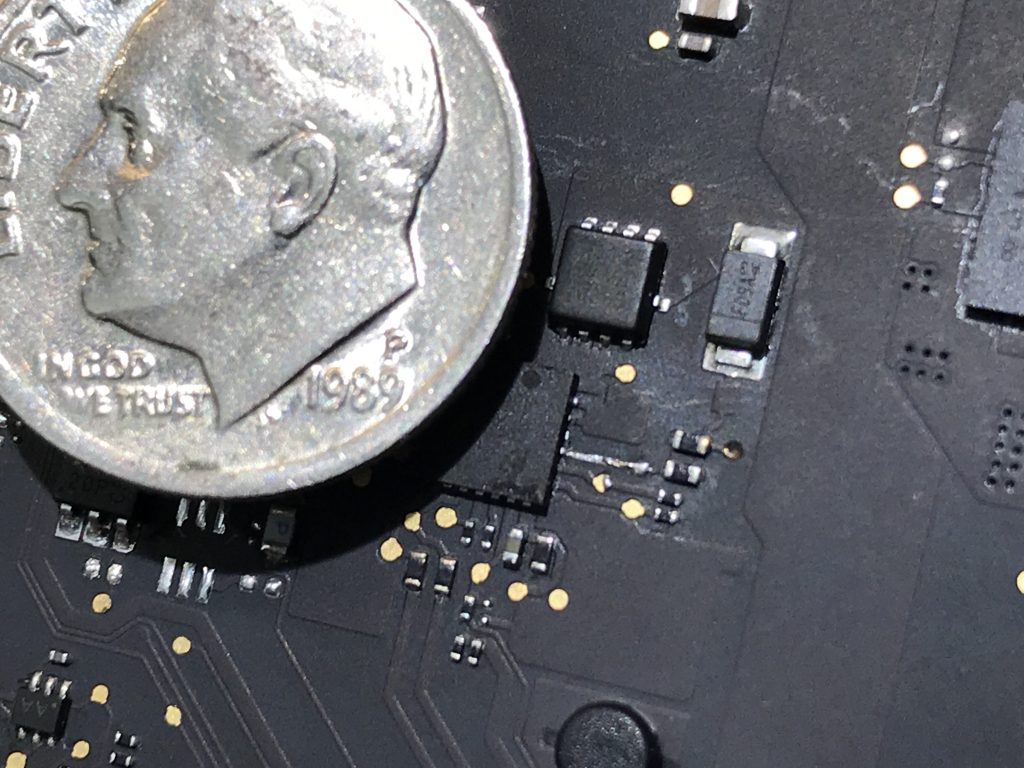
i build the bridge for the trace and install a new backlight driver QFN24. the next photo shows the repair completed with a dime for scale.
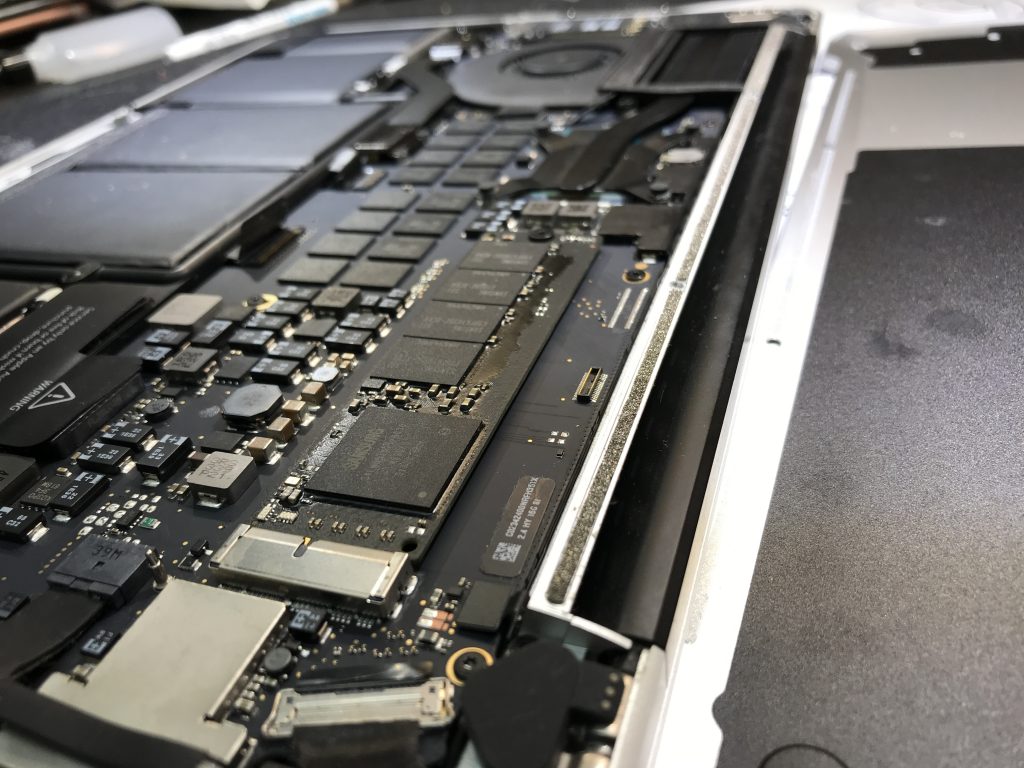
we now have a much cleaner board along with the damaged components replaced. let’s see if you can spot the component now (hint – dead center – upside down) and notice that all the corrosion and burnt parts are now replaced and the board is now clean. (compare to the 5th photo of this post)
the computer is now much cleaner. you can compare the next 2 photos with the top 2 photos. no more fuzzy dustbunnies!

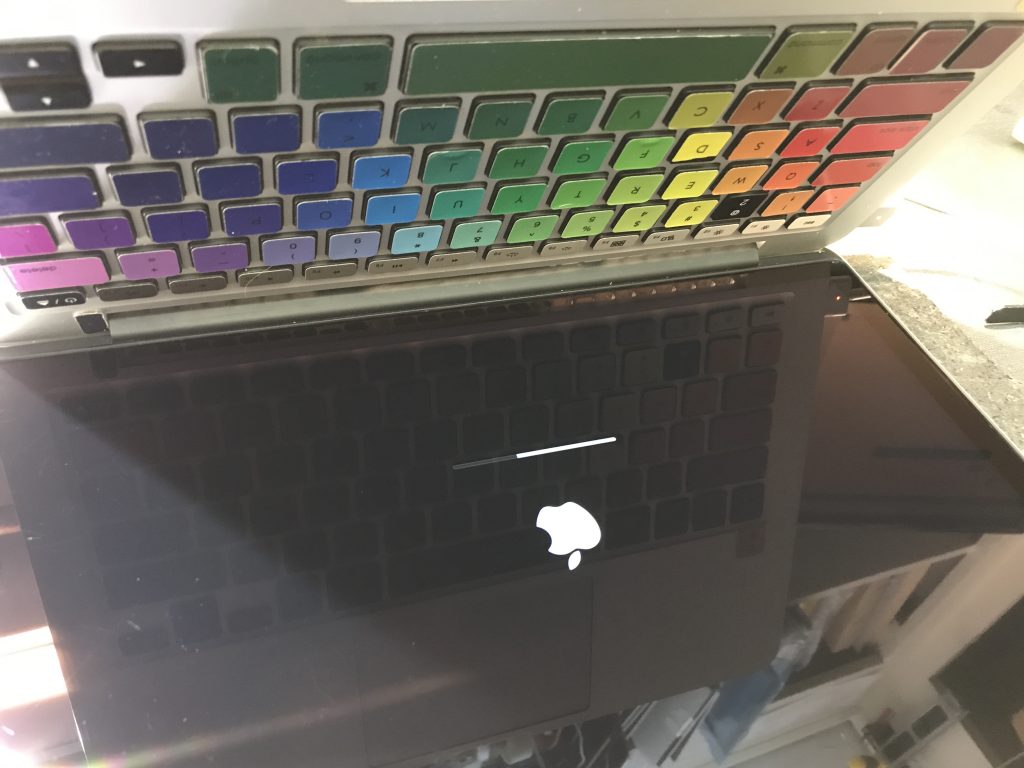
aaaaaand most importantly of all, we now have a functioning backlight!
even though the dirt and damage looked very bad, all in all i feel very confident in this repair. the damaged components were replaced and the corrosion removed with a properly heated pH balanced surfactant. all is well.
if you have questions about a device, i invite you to contact me and tell me about it.
