serving hattiesburg and the surrounding area.
(columbia, petal, purvis, sumrall, laurel, USM, jcjc, jones county, lamar county, forrest county)
serving hattiesburg and the surrounding area.
(columbia, petal, purvis, sumrall, laurel, USM, jcjc, jones county, lamar county, forrest county)
custom in ear monitors? what are those? for musicians – it’s the future. no longer any need for pushing air on stage these days – cab emulators and in ear monitors (ciem’s) are taking the place of stage wedge monitors and actual guitar amplifiers. while many still use actual amplifiers, the quieter stage has become the preferred option to help tame the volume that the musicians hear versus what the crowd hears. too many times the stage volume can over shadow what is actually being pumped to the crowd and the front of house speakers. this results in a lot of distortion and overall decrease in the listener experience.

these large speakers have been reduced to fit inside the ear – very close to the eardrum allowing these tiny speakers – called drivers – to sound very big – even though they are very small and compact. very much like some in ear headphones that people use when jogging, except that the drivers are mounted into a custom made piece that fits the exact contours of your own ear. an impression is made at your local audiologist and those impressions are used to create a mold which is used to cast resin in varied colors that will become the shell that will contain those drivers.
i’ve played bass for years and owned my own custom in ear monitors since 2006. westone dual drivers. dual drivers were preferred for bass players and drummers. i think this allows for larger drivers and a larger cavity to allow for resonance. i’ve had them rebuilt a few years ago, and while using them helping at my church, they blew again for a second time. as i use them frequently, it was now time to get them fixed again. rather than send them off again, i made the decision to maybe rebuild them myself. i felt that if i could source the right materials, i could build them better than before.
so i ordered in some parts and as a perpetual student, began the learning process. my brother in law, a long time Christian artist had been given some older custom in ears from his brother that were broken, and i had already fixed them for him to try to use. now these monitors were custom fit for brother david, and i felt pretty sure that this would not be very comfortable for brother rayborn. and the more i thought about it, the more i felt that i would like to crack open those monitors again and repurpose those drivers into a custom shell that was made just for him. and in the process, i would gain some experience. so i had brother rayborn schedule an appointment with the same audiologist that also used to get my own impressions made – audibel on hardy street and 40th. stephanie (the owner) actually was the one that helped us all with our impressions.
after i got a hold of the impressions (yellow rubber), i began the process of removing the excess material and craft them as close to a finished product as i could. paying attention to details in this stage would allow me to have less work later on. i then immersed them into the mold gel and allowed them to set.

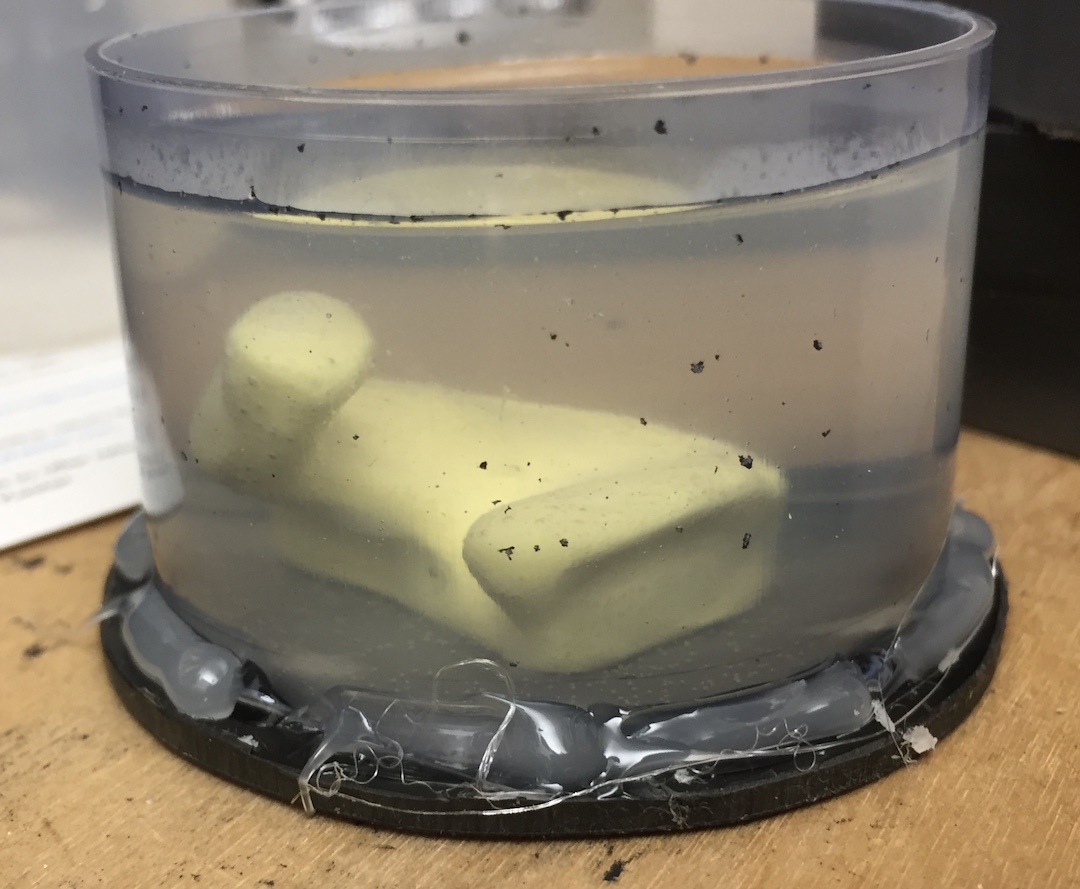
once the mold was solid, the impression was removed leaving a perfect “cup” in the shape of the ear cavity. resin was poured and cured.

and once they were cured, hand tools were used to clean up the excess resin. i have a clear base, and a variety of colors i can mix, but made a decision to use a light gray for this first set. i actually had full freedom to make design choices for brother rayborn. he let me do what i wanted. i chose gray as over time, my own monitors had began to yellow. the faceplate was black, but the inside part that goes into the ear canal started out as clear, but after several years, looked a bit dingy, even though they were clean. i felt that this color choice would hold up the longest.

the next part of the design process is the choice of face plates. the surface that will actually be visible. i really labored over what to choose. what would look the best. there are soooo many options. literally the sky is the limit. from very bold – neon green, chartreuse, diamonds, gold – to very subtle and not as noticeable. the older shells that we were harvesting the drivers from were a skin tone and with my own design choice felt that even though this color is very subtle, it also looked clinical – much more like a hearing aid, than a premium personal custom made musical device. but we didn’t want to go too flashy, but did want to make some sort of subdued statement. i felt that a black stained wood faceplate would do the trick. so i began to source some wood options. i bought several, but landed on basswood. i know that some guitars are made from basswood. a very light weight option. but that can be strengthened with the proper finishes.


the stain was applied and then the sealer/finish and sanded, sanded, sanded and sanded some more.
[box] “did i mention that there is a large amount of abrasion processes in doing these?!! – not sure i even have fingerprints left” [/box]


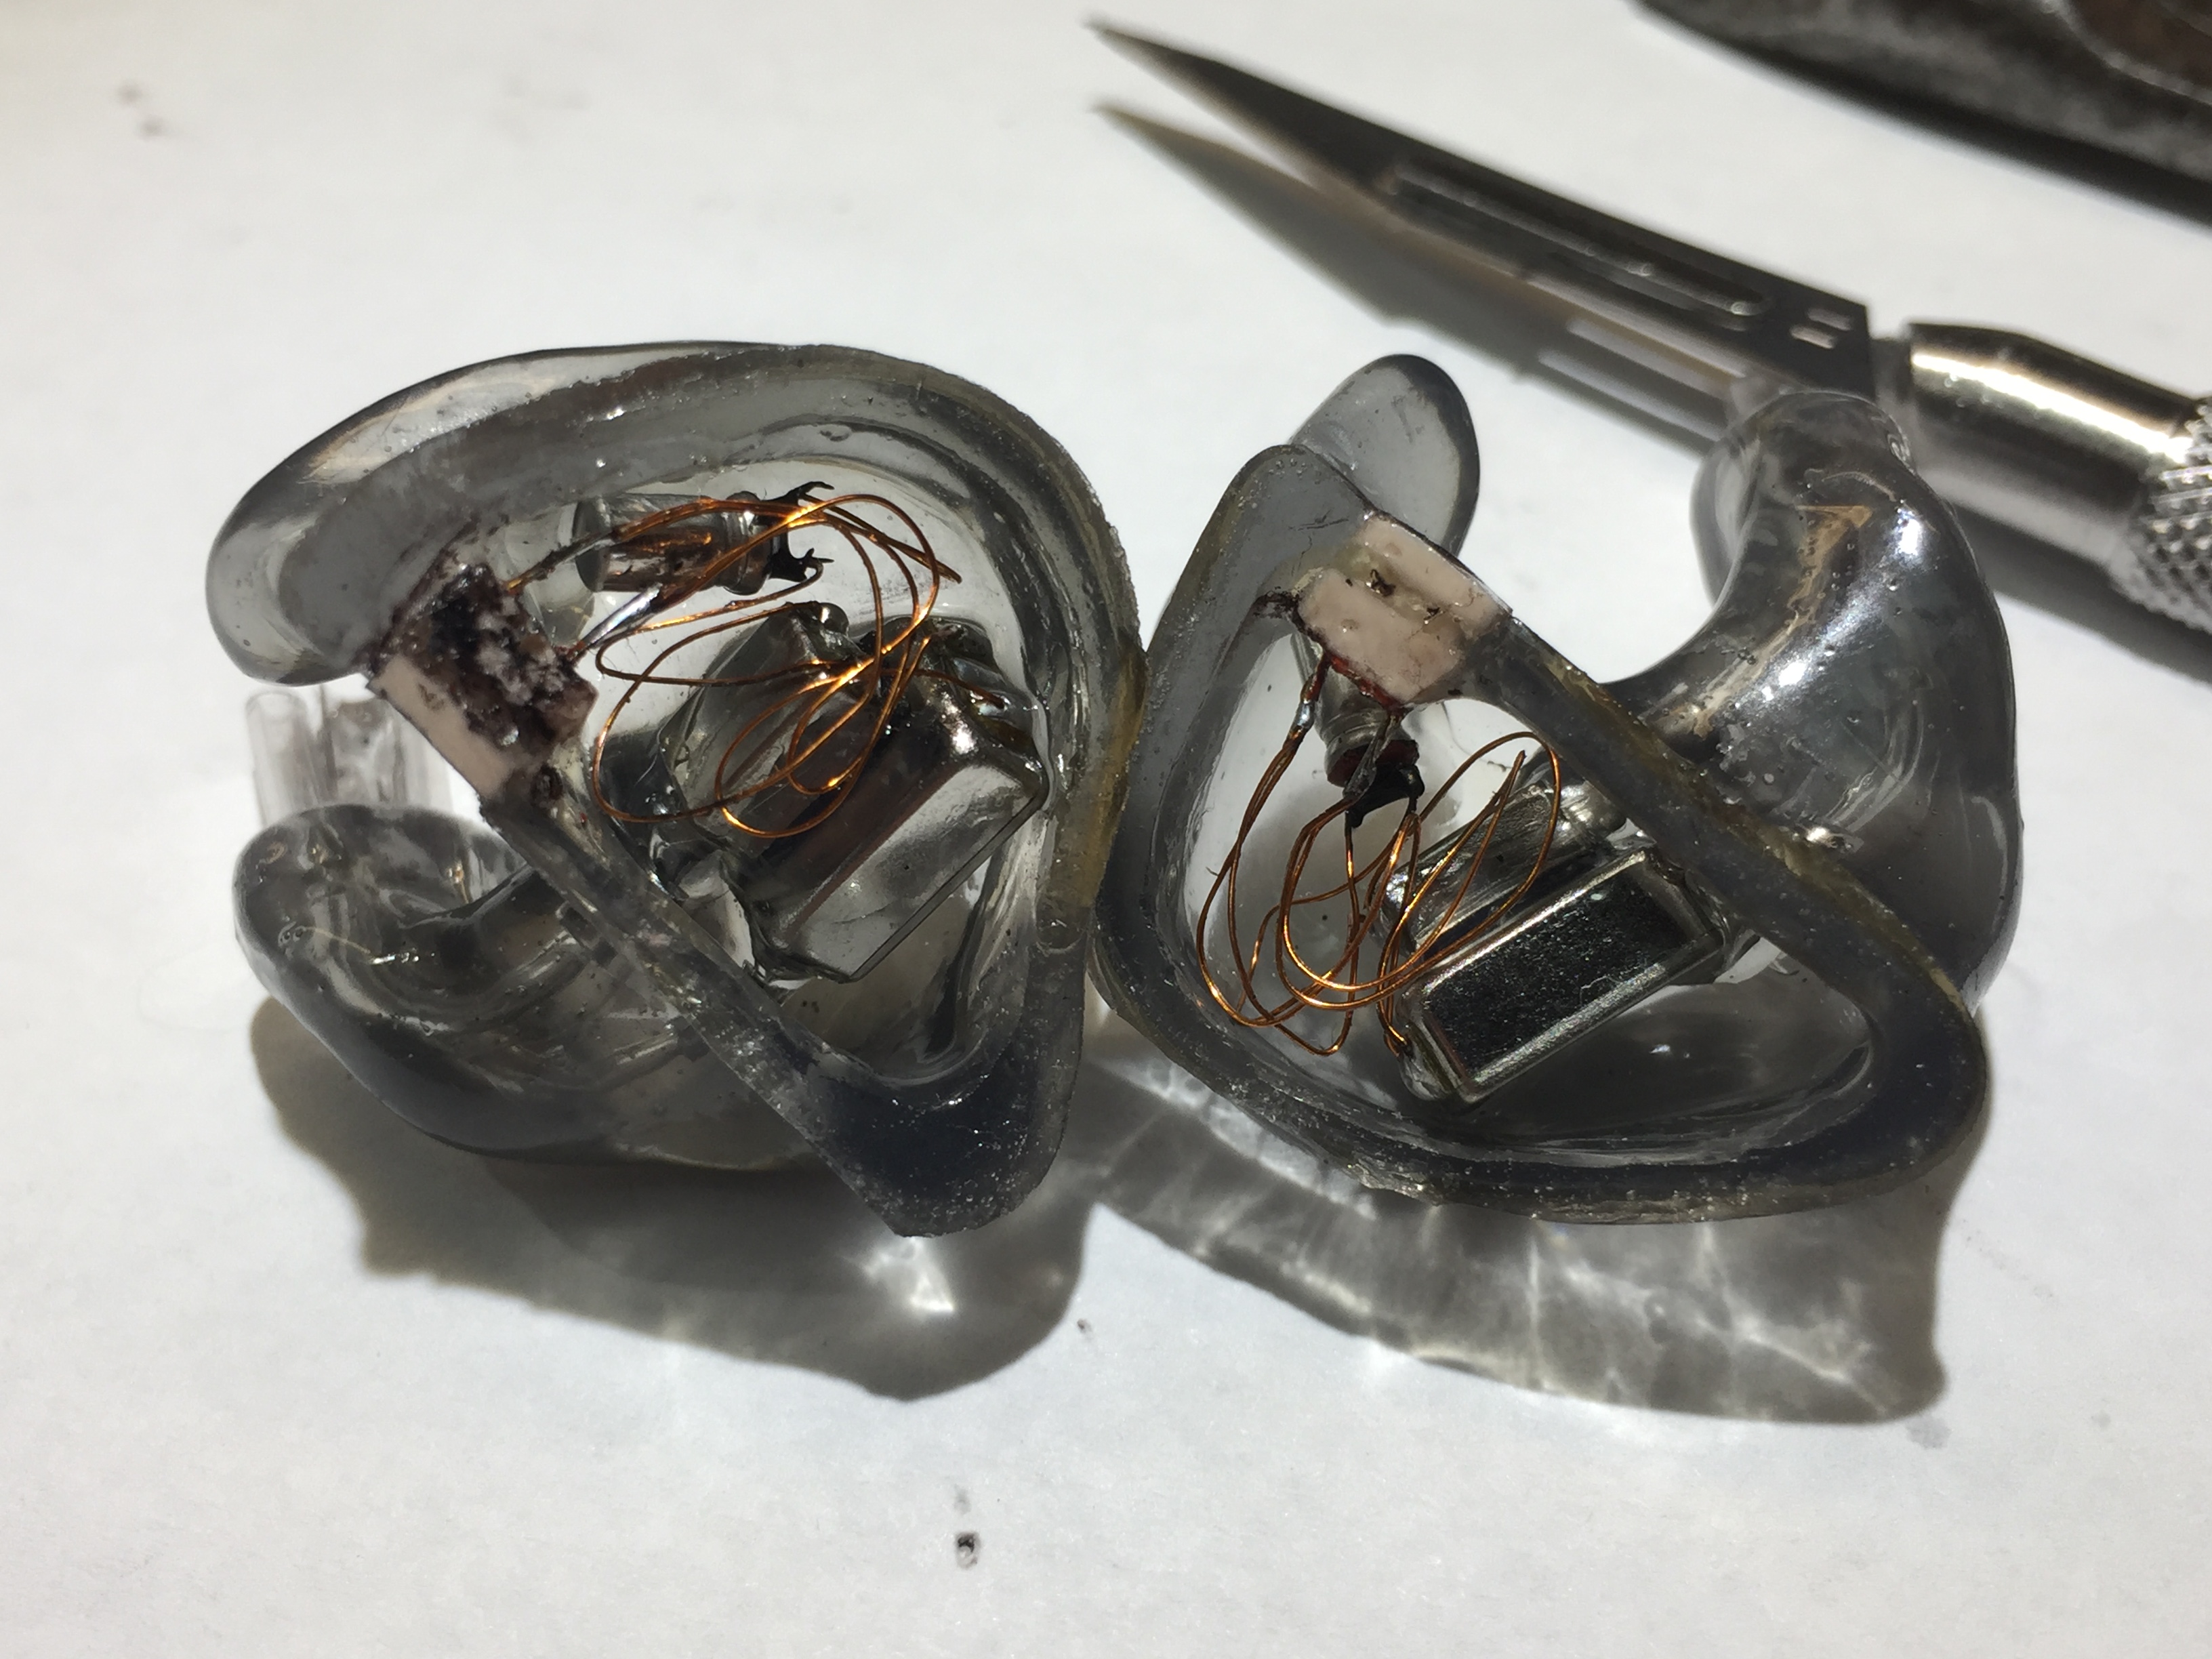
so at this point, i need to begin the process of inserting the drivers. which turned out to be a tighter fit that i had anticipated. retubing, rewiring and finding a fit inside the cavity. seems there was only one way that all that hardware was going to fit. if you take a close look, you can see the clinical looking old shell that the hardware was harvested from.

which brings us to the cable. cables are not cheap. and this cable was still going strong, but had that same clinical look to it. so i researched a method to recolor the cable and chose black. it turned out quite nice. i hope to add some better photos later on.

now the deadline for this build was fast approaching. david and the giants were traveling to the philippines for several concert dates and i wanted brother rayborn to be able to use them then. i actually finished them the night before they were leaving and fit them on him the morning of. whew…
so i didn’t get a finished shot of the build, but did get a very nice shot as i was applying a resin dome to the now attached faceplate. and yes, those are hockey pucks. i’ve used hockey pucks for years for various purposes. this one was to help steady the monitor as i was applying the resin. i’ve since sourced a better way.

so that is my first set of custom in ear monitors – i really liked how the stain set on the outer most layer of wood and when the wood was shaped to the monitor it left a natural wood “ring” around the edge. a nice detail.
so – next customs will be for tracy, and then i will finally dig into mine.
if you find that you may be interested in some custom in ear monitors provided by a local artisan, send me a message and we will discuss it.

Great Article, i always look forward to read more like this. really helpful. keep it up!
thanks for the feedback – ’bout ready to dig into another one!
Great Article, i always look forward to read more like this. really helpful. keep it up!
thanks for the feedback – ’bout ready to dig into another one!
[…] i have used a regular amplified speaker. but lately, i have been helping at a church that only uses in ear monitors. as a bass player, these tiny in ear speakers severely limit the bass experience i have been used […]
[…] i have used a regular amplified speaker. but lately, i have been helping at a church that only uses in ear monitors. as a bass player, these tiny in ear speakers severely limit the bass experience i have been used […]