serving hattiesburg and the surrounding area.
(columbia, petal, purvis, sumrall, laurel, USM, jcjc, jones county, lamar county, forrest county)
serving hattiesburg and the surrounding area.
(columbia, petal, purvis, sumrall, laurel, USM, jcjc, jones county, lamar county, forrest county)
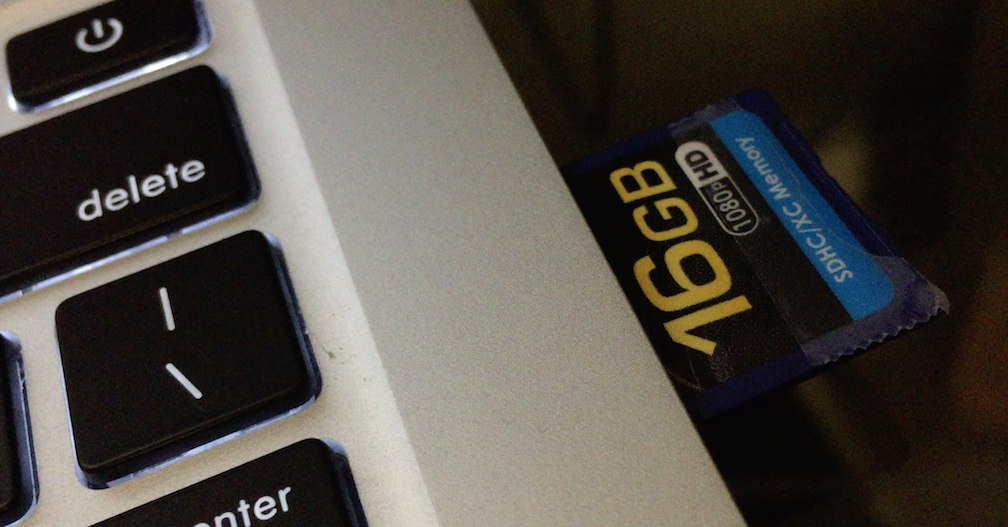
one of my accounts recently called for help with a damaged sd card. i always like so see it as soon as possible, and before i picked it up, i asked them to send me a photo.
the reply was “ehh, it’s kind of fragile, i’m afraid to.”
we have been doing more and more data recovery with damaged flash drives. drives that have been bent, smashed, broken and each with information that is very valuable to the owner of the device. to me, it’s like a puzzle. a puzzle that is different each time. solving the puzzle means a happy customer and a payday for me! win, win! many times this involves micro soldering as the breaks are so small that they are un-noticeable to the naked eye. you need a microscope to see the damage. sometimes the damage is pretty apparent, but mostly it’s subtle.
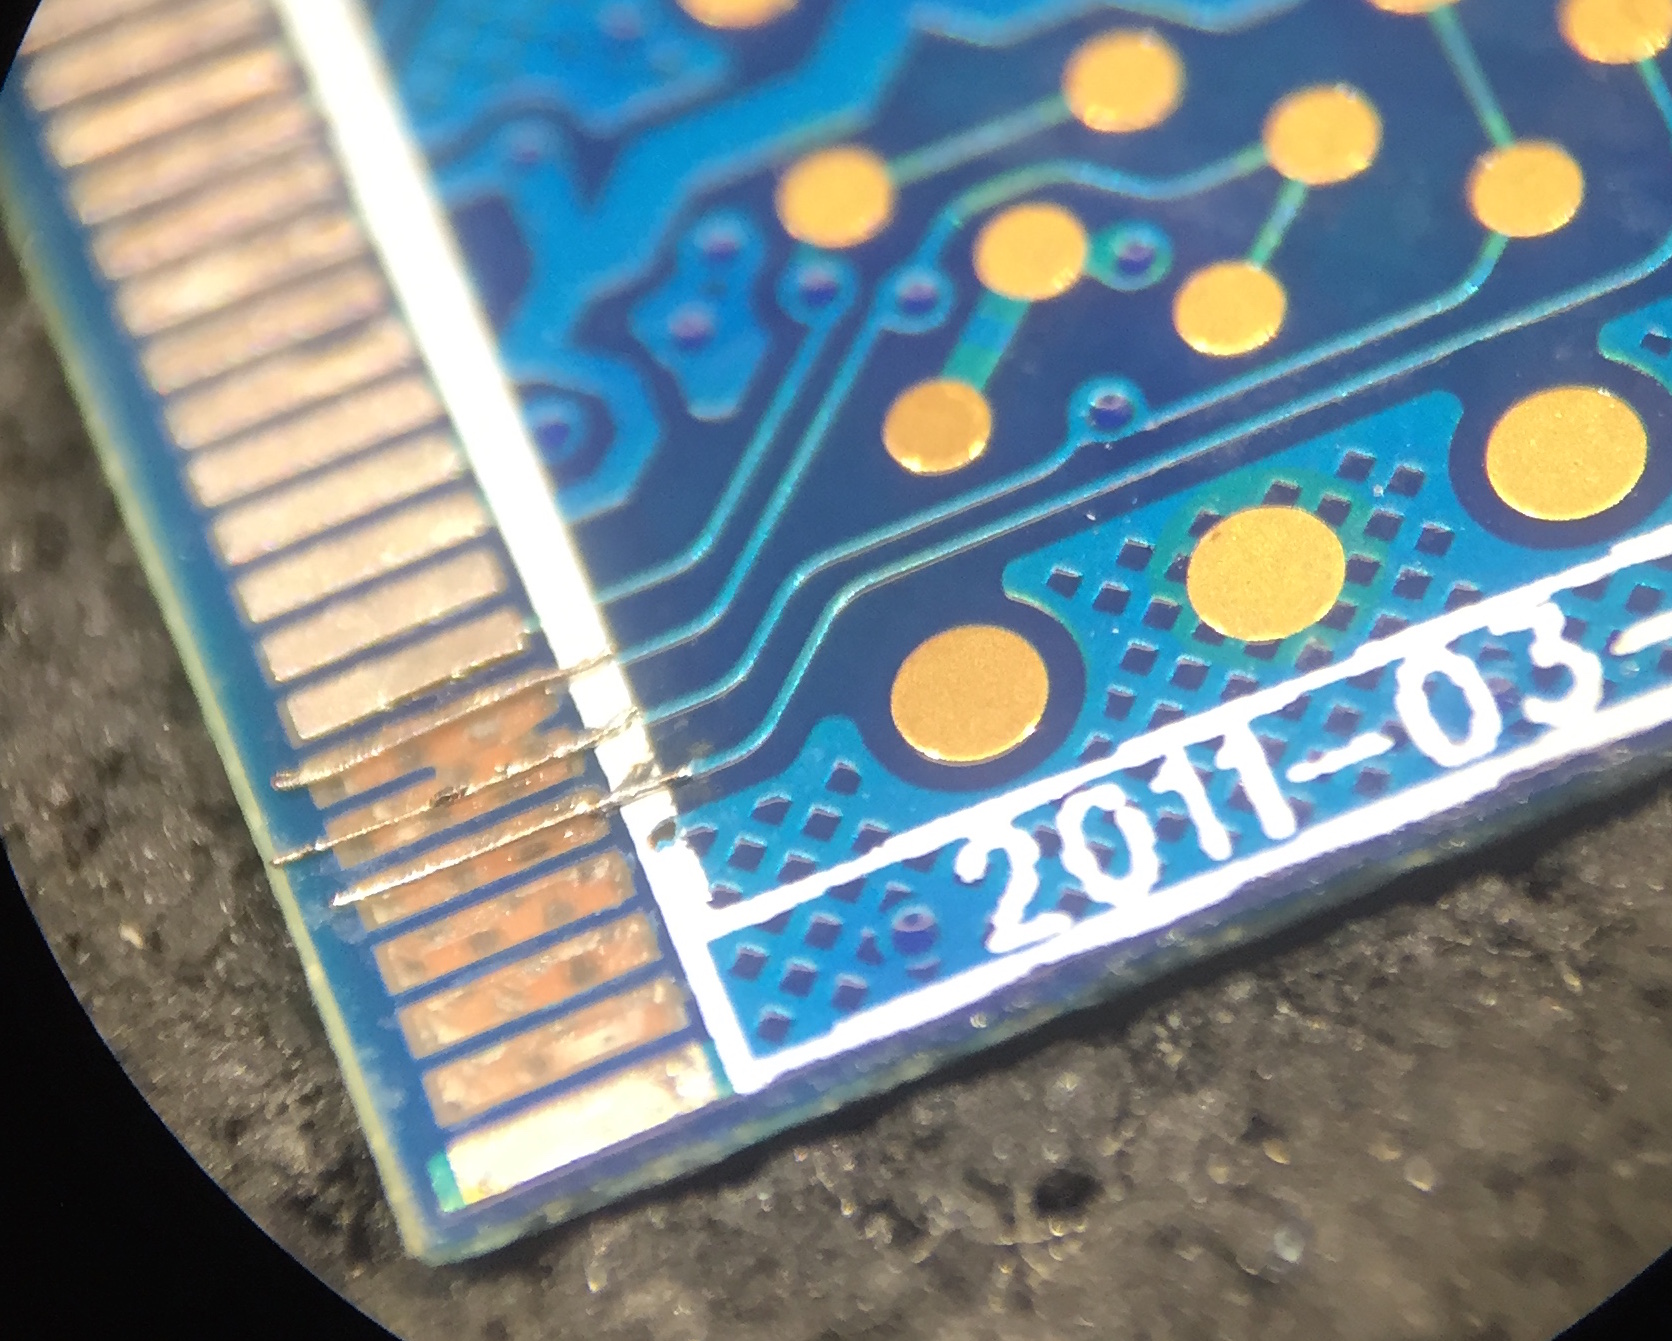
after picking the card up, i can understand what they meant by the card being fragile. the card was missing approximately 40% of it’s plastic shell and the motherboard was held into the shell with some scotch tape. which is fine by me because to get an idea of what was wrong, we need to look under the hood anyway. once removed, the board was very thin, was flexing in my grasp, and the card had a noticeable bend in the middle and even though the card was recognized when placed into a port, no data was accessible.
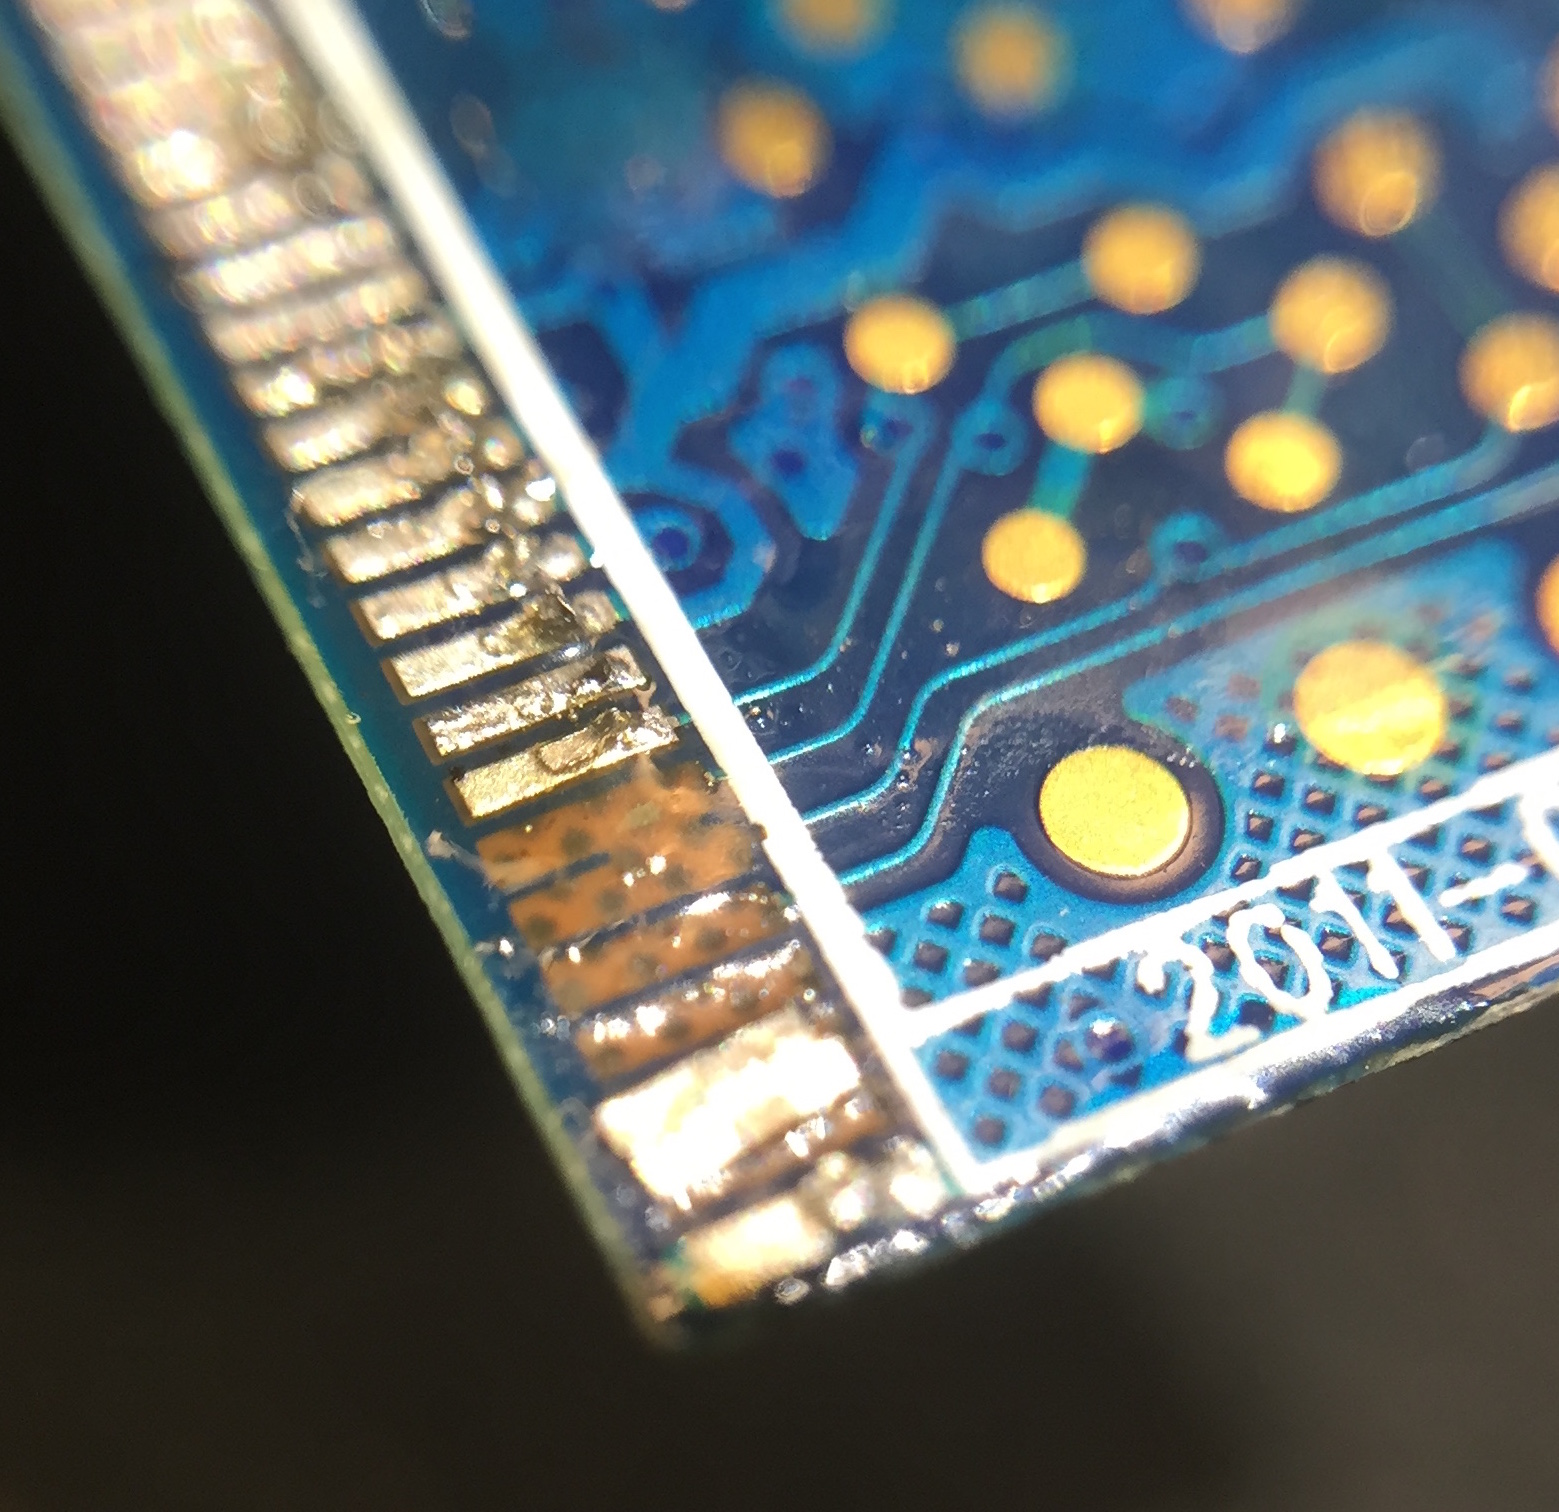
looking closer with the microscope, i could see that some type of force had been applied to the rear module on one side and with the shift, all the legs were bent somewhat sideways. looking closer i could see that some of the pads that the legs were attached to, had lifted. knowing how fragile these pads are, i guessed that those had been severed and that was the reason we could no longer access the files.
so… let’s remove that module and see what’s what.
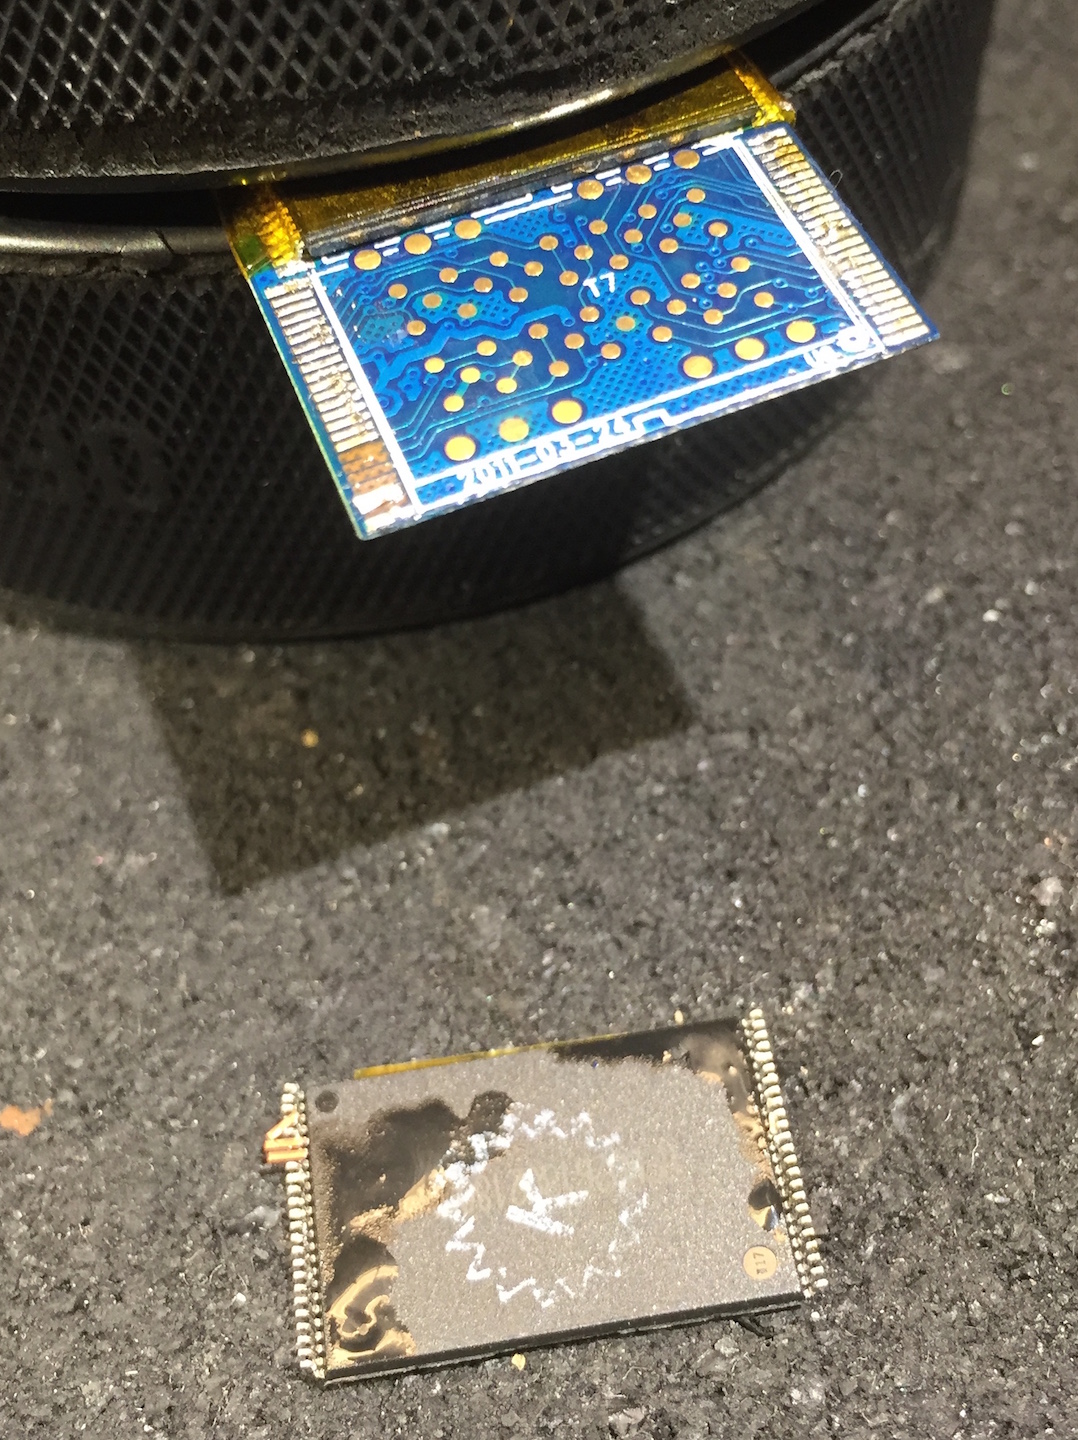
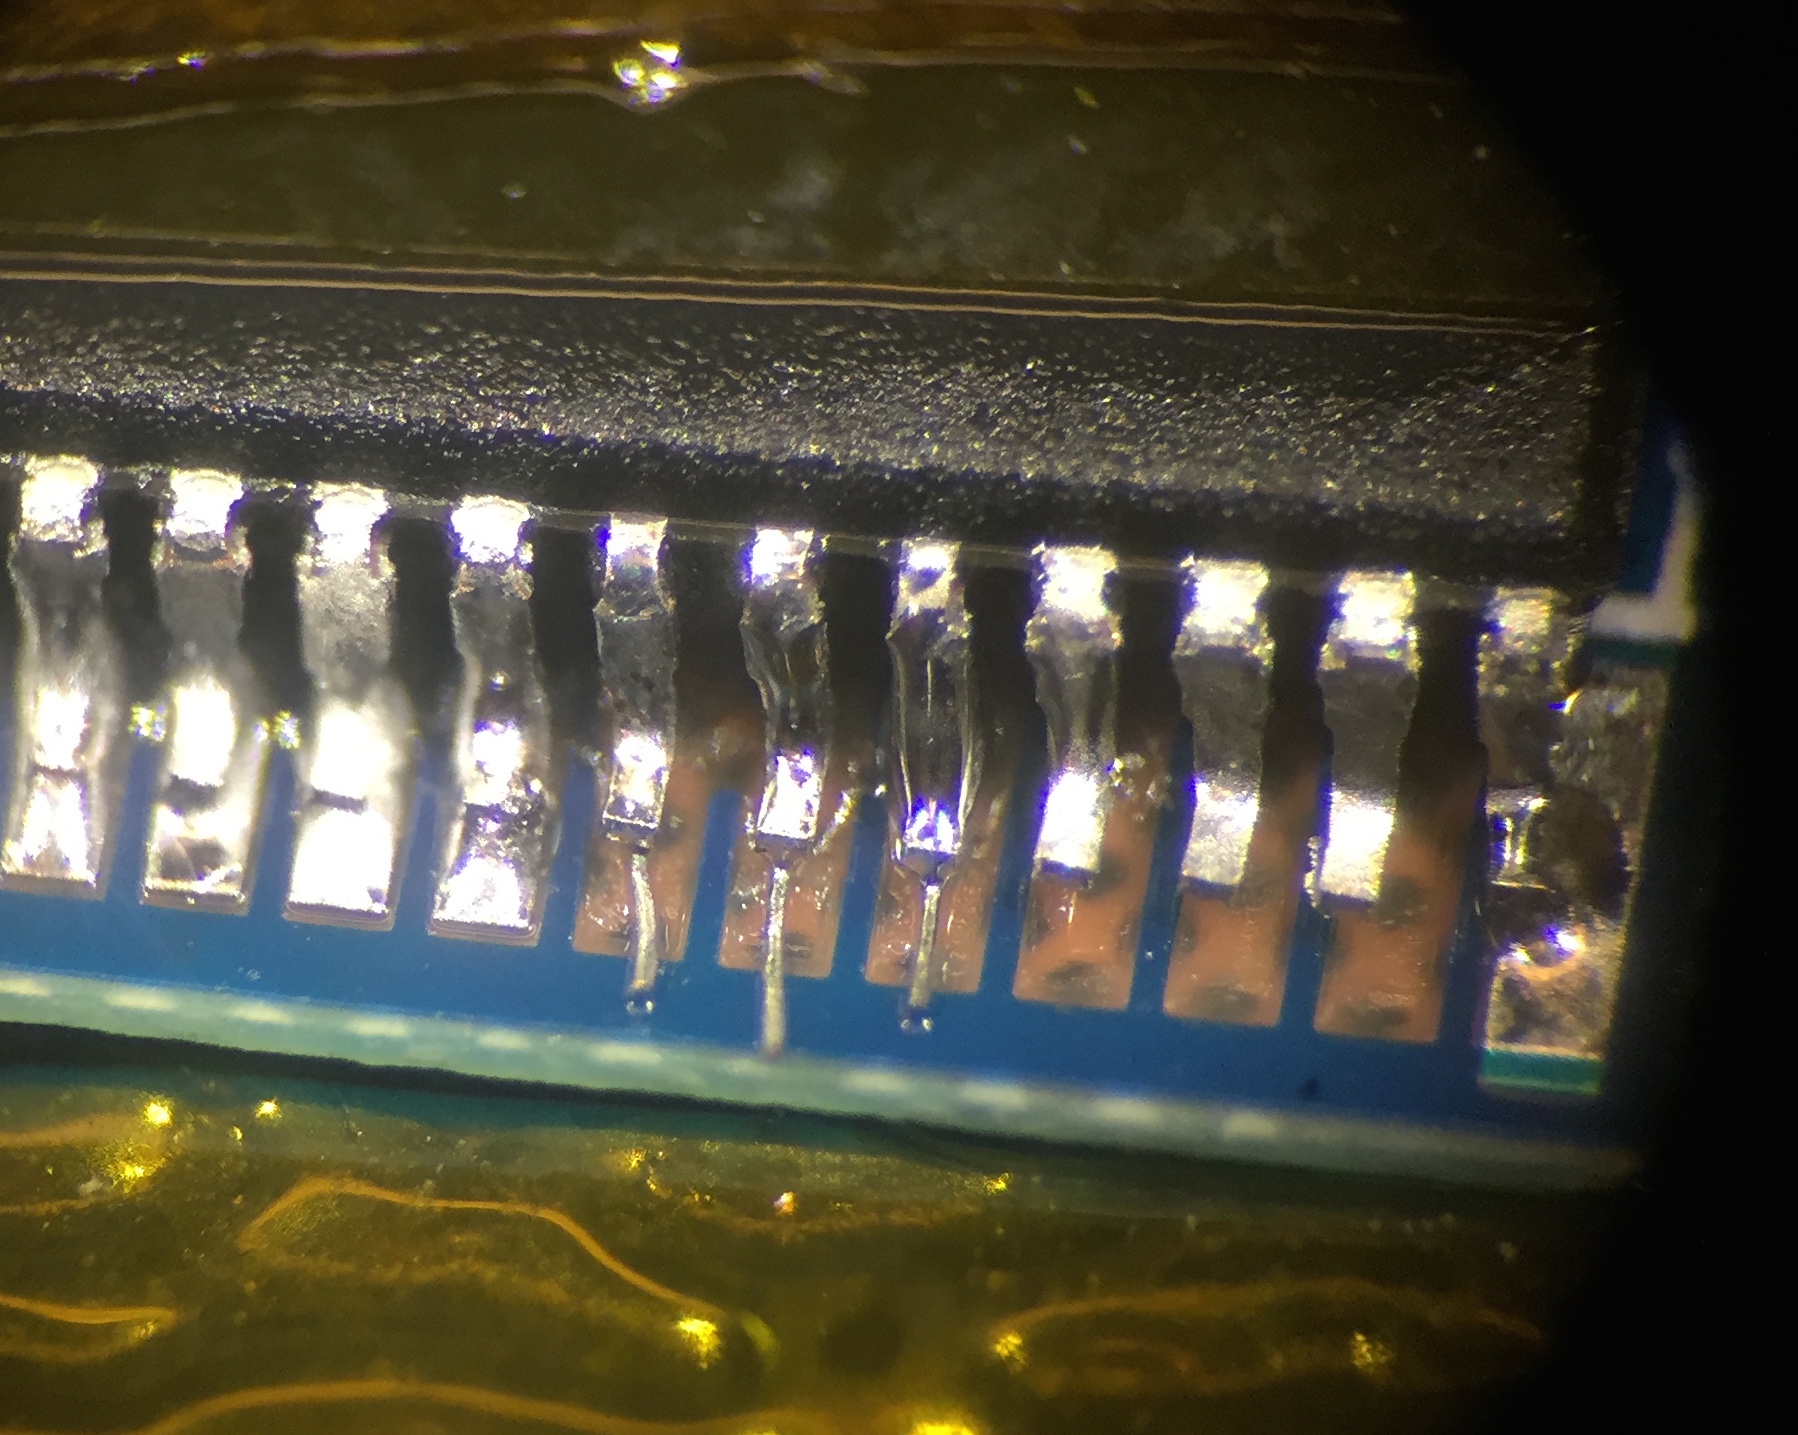
and there it is… 3 of the pads had been severed and had lifted with the module and were no longer connected to the card’s motherboard.
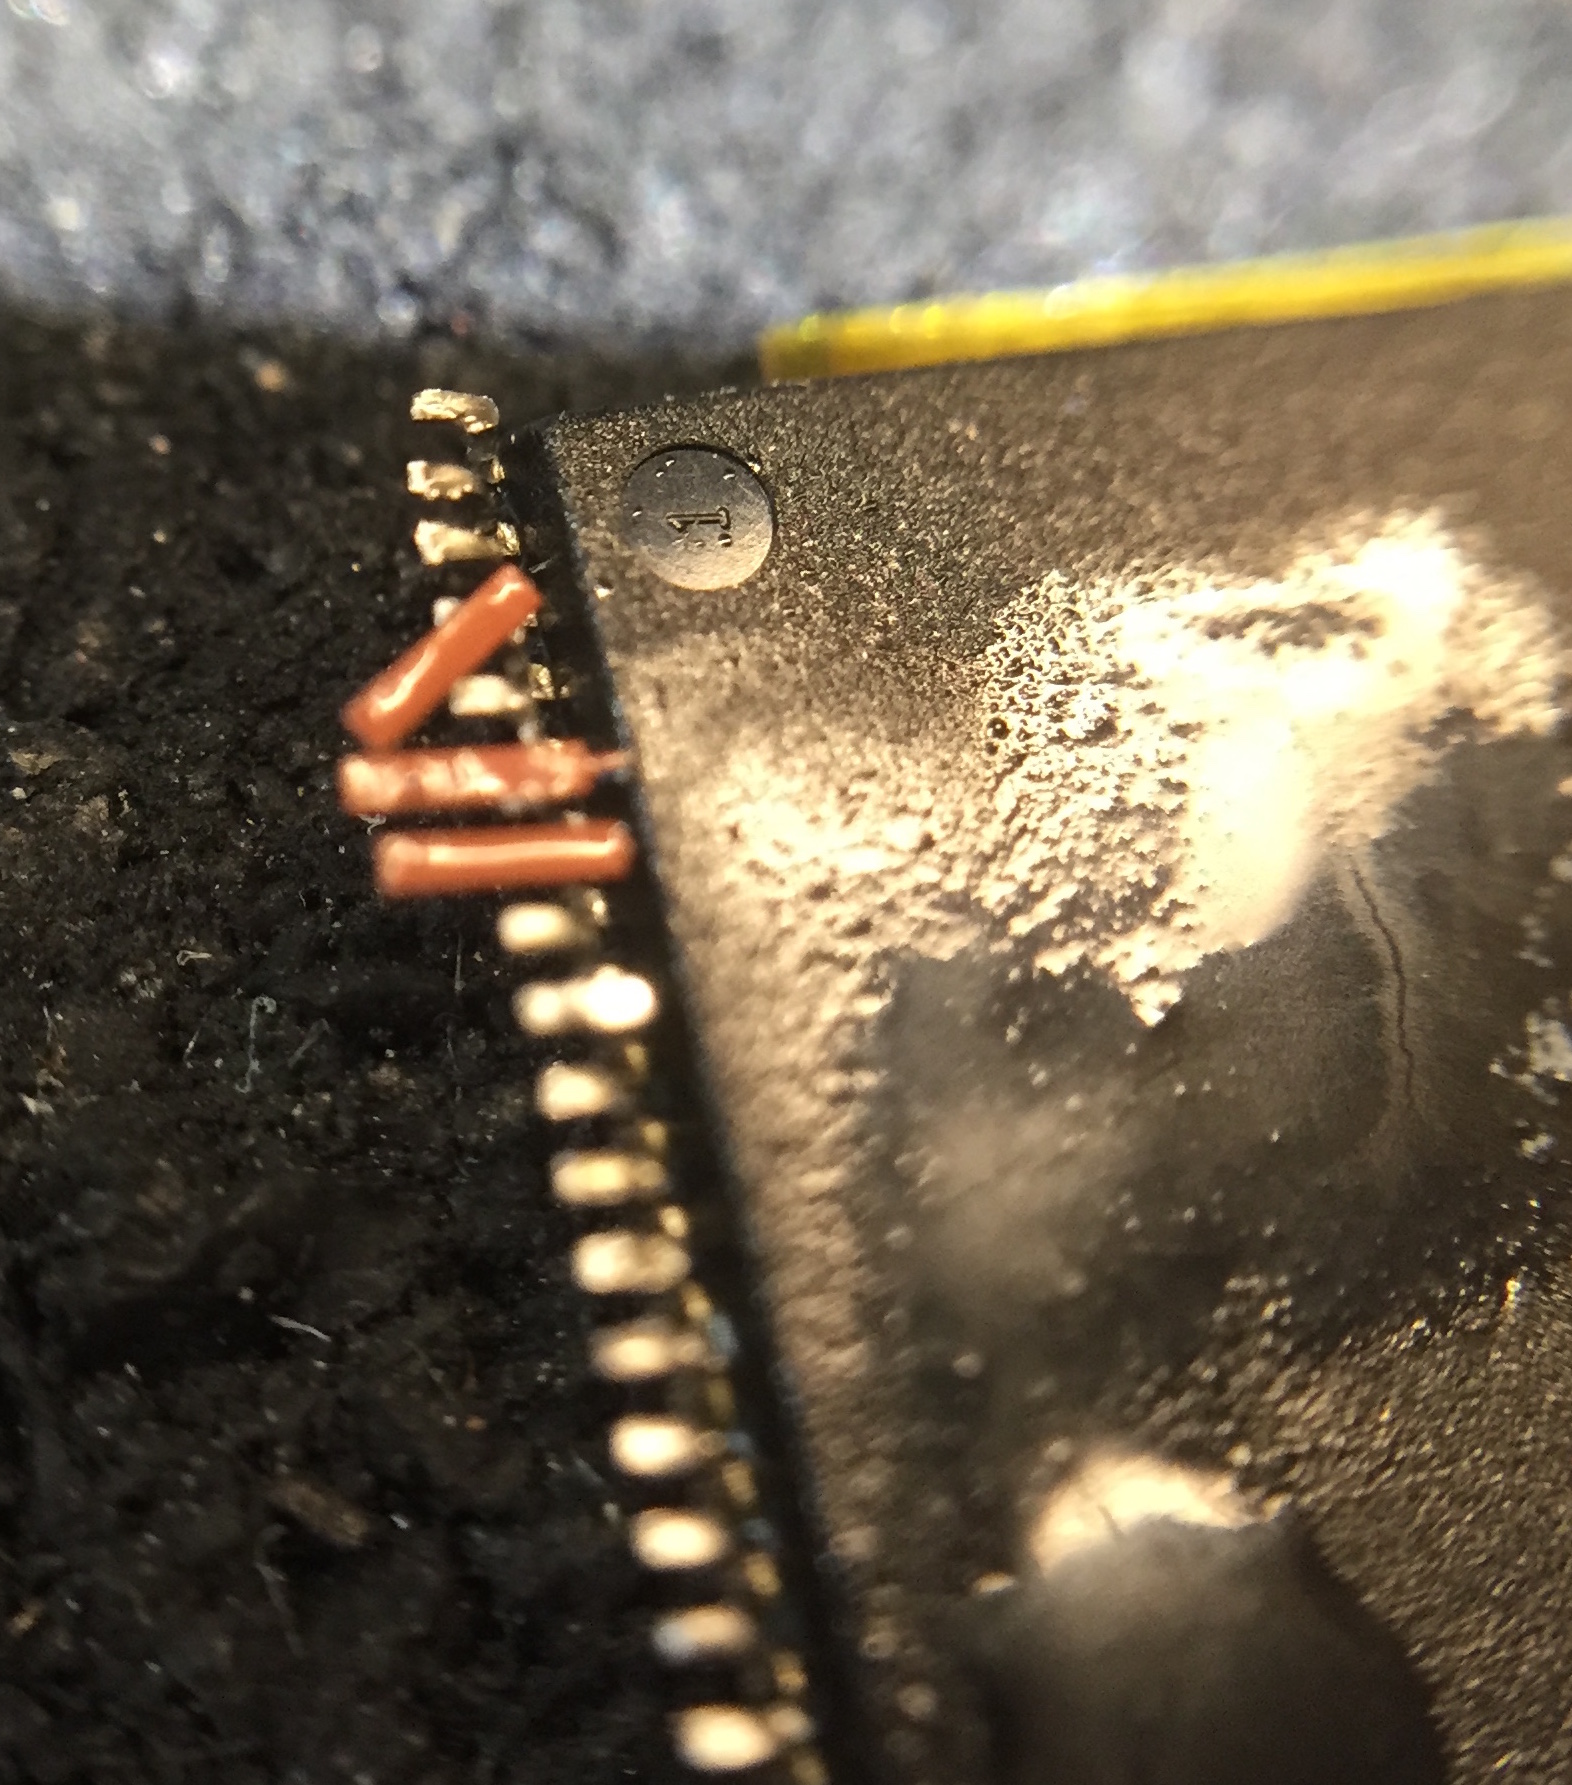
so let’s begin to try to fix this damage. i started with scratching away some of the area around the missing pads to expose the trace.
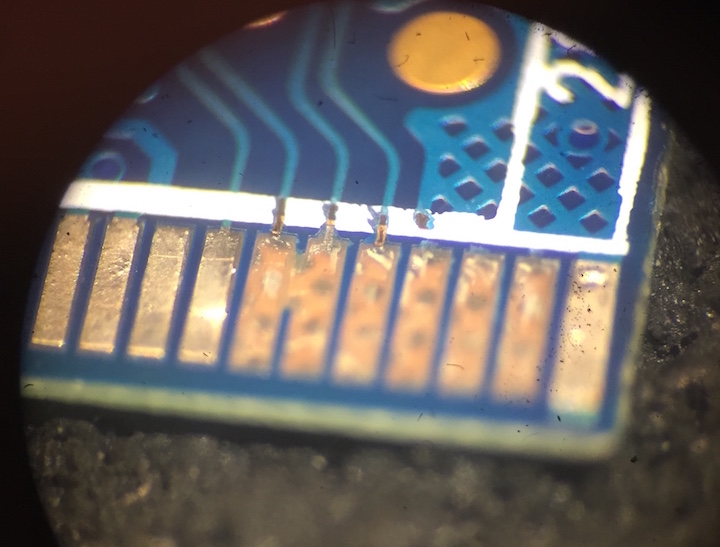
then tinned the traces in preparation for attaching a new substitute pad. hard to see in this photo – reason is that the traces are very very small.
in the previous photos, you may have noticed that there are 6 total pads missing. you would be correct. but 3 of them are dummy pads and not necessary for the function of the card. the pads do not go anywhere. you can see in later photos where we just left them open. this is verified by looking at the other module and the very same dummy pads are also present on the other module.
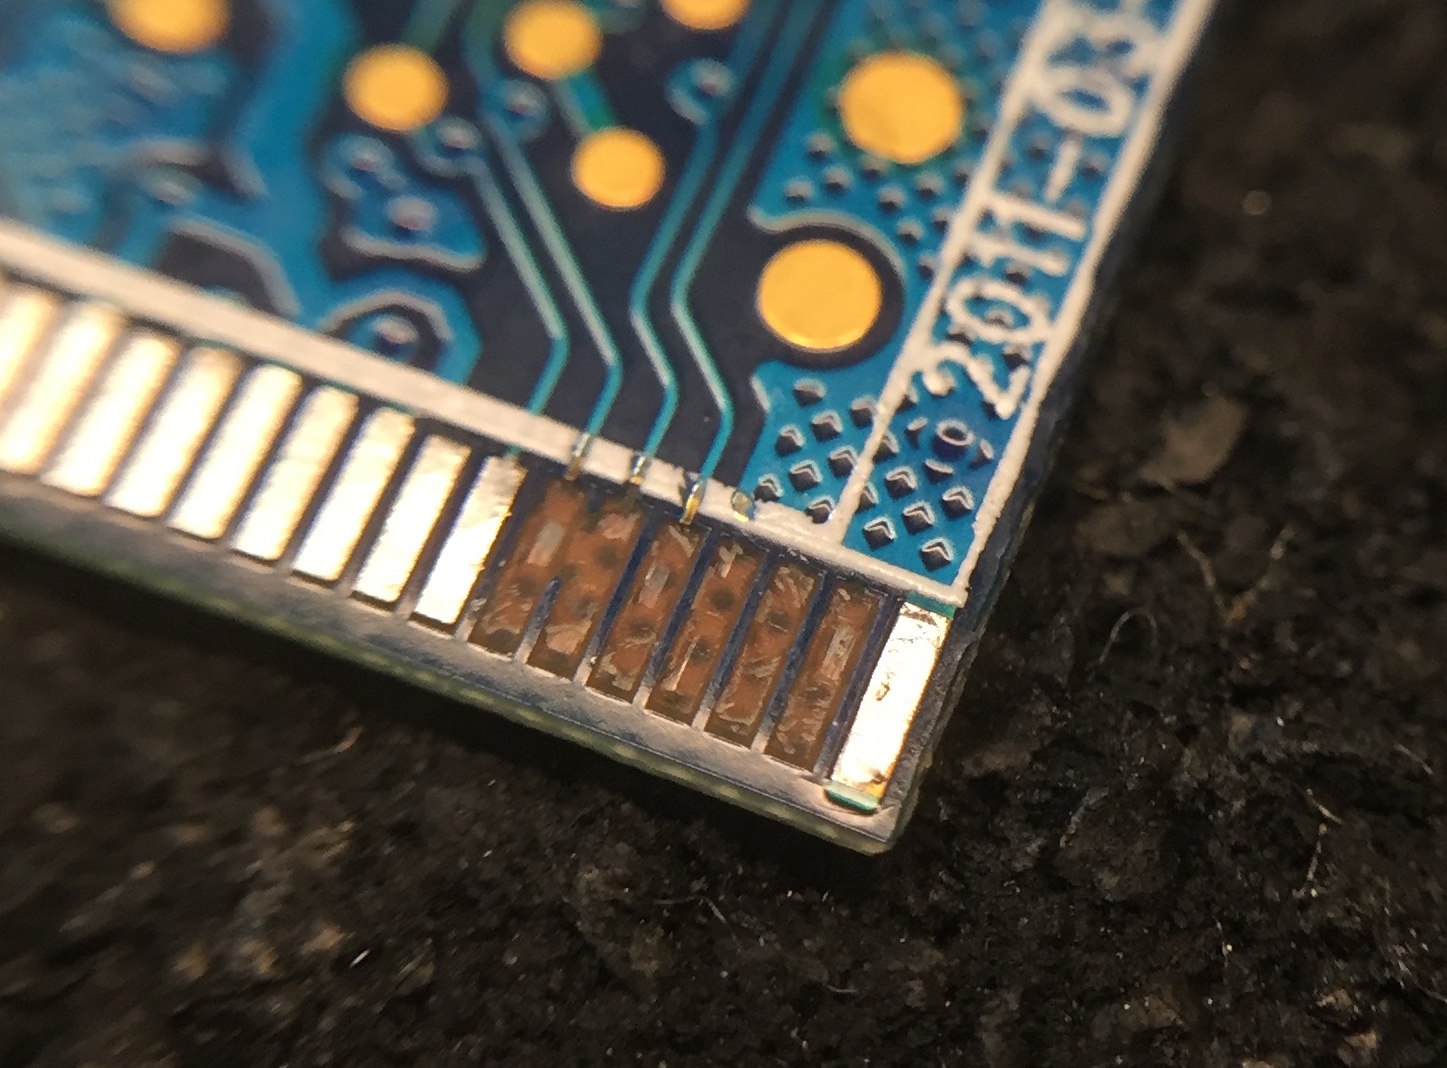
using a very fine diameter copper wire, i micro soldered it to the exposed trace and laid a length of it into the exposed bed that no longer contained the pad. all we really need is enough to reattach to the leg of the module. then repeat 2 more times.
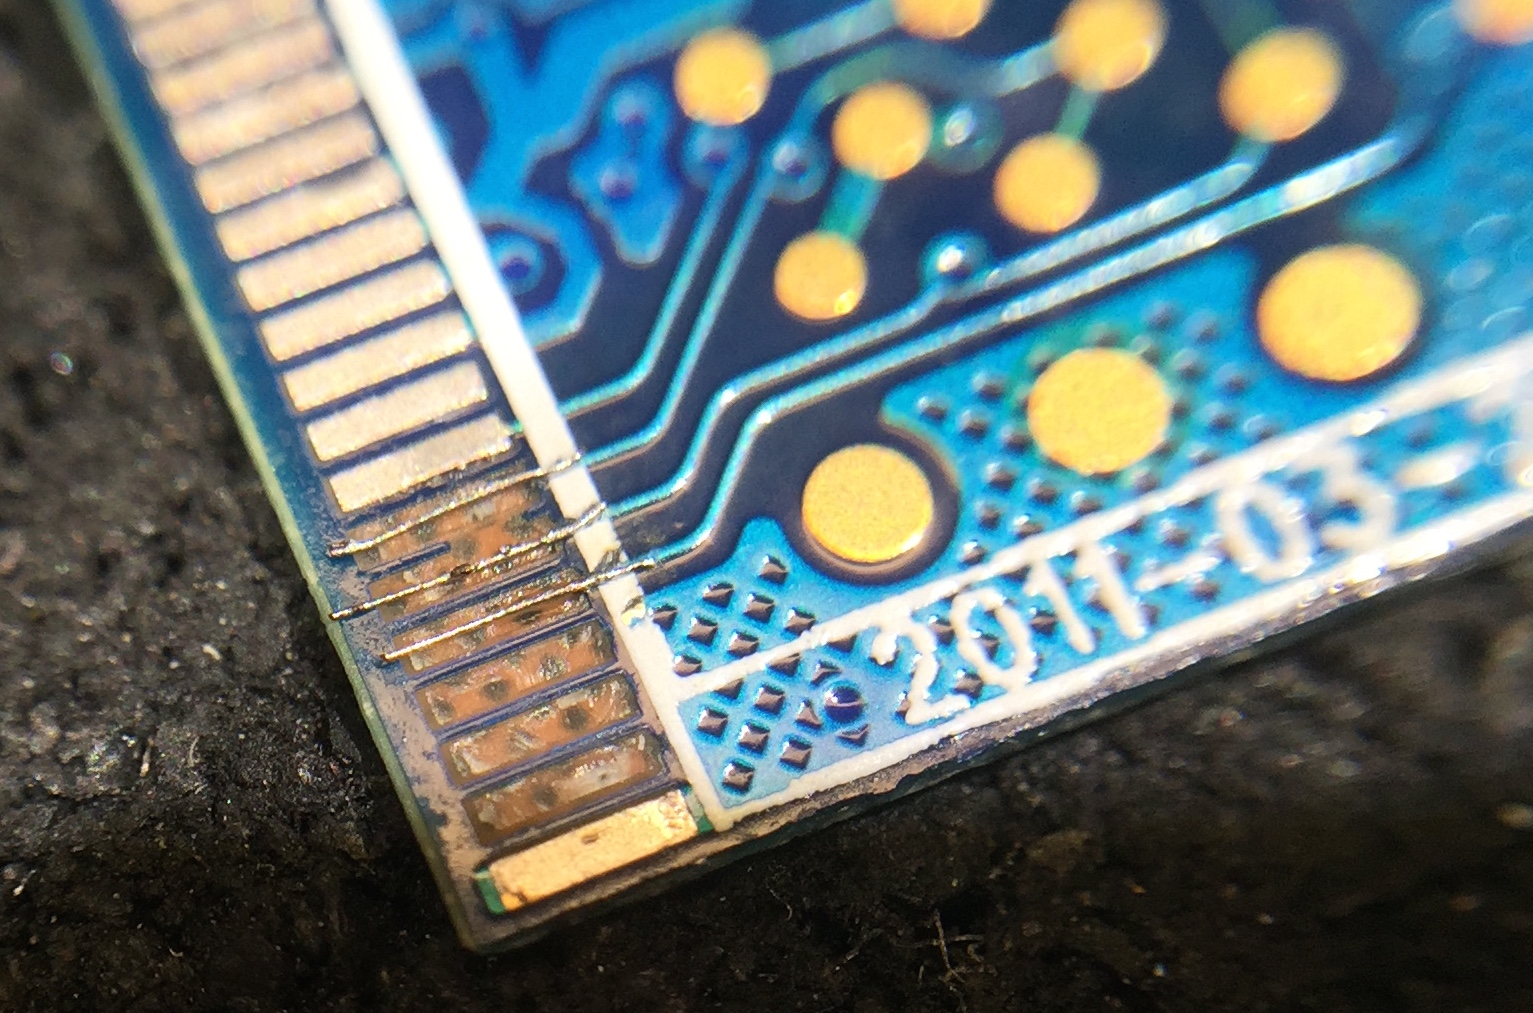
i next moved to the module itself. very gently, i began to straighten the legs of the module to match their place on the motherboard. then re-soldered them one by one beginning with the damaged pad area. [box]the reason i started in the damaged area first to reconnect the module, is that there is a very real possibility that the traces i had just soldered would come loose when heat was applied to the other end and i would have to redo them. the amount of heat i use would travel very quickly along that very slender bit of copper and if i applied heat too long, the solder on the other end could melt and become detached (yikes!). i have to be careful not to undo the work i have already accomplished.[/box]
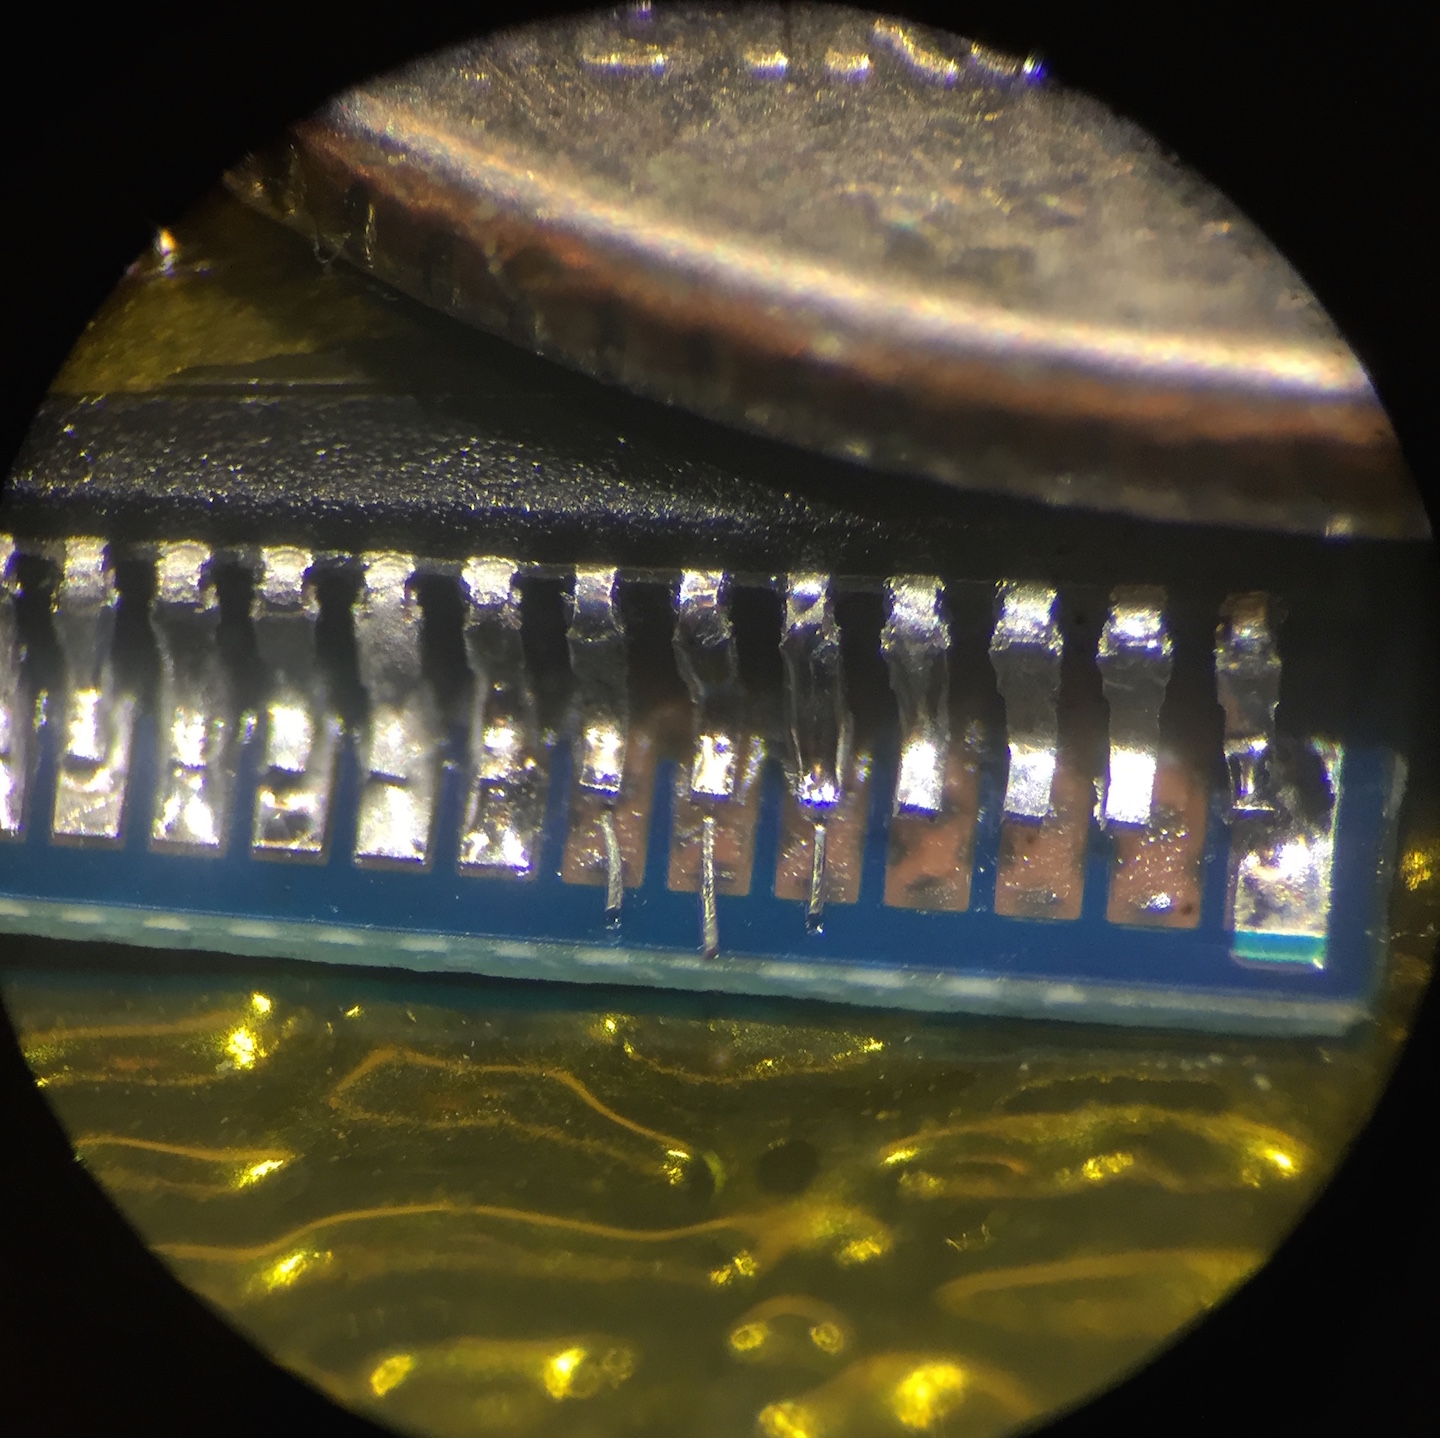
that is a dime laying on top (for a heat sink and for a size comparison – to give you a little perspective on how tiny this these legs are.) you can also see the 3 legs that would have been attached to the dummy pads that we just left hanging.
looks good! well now, let’s test our work.
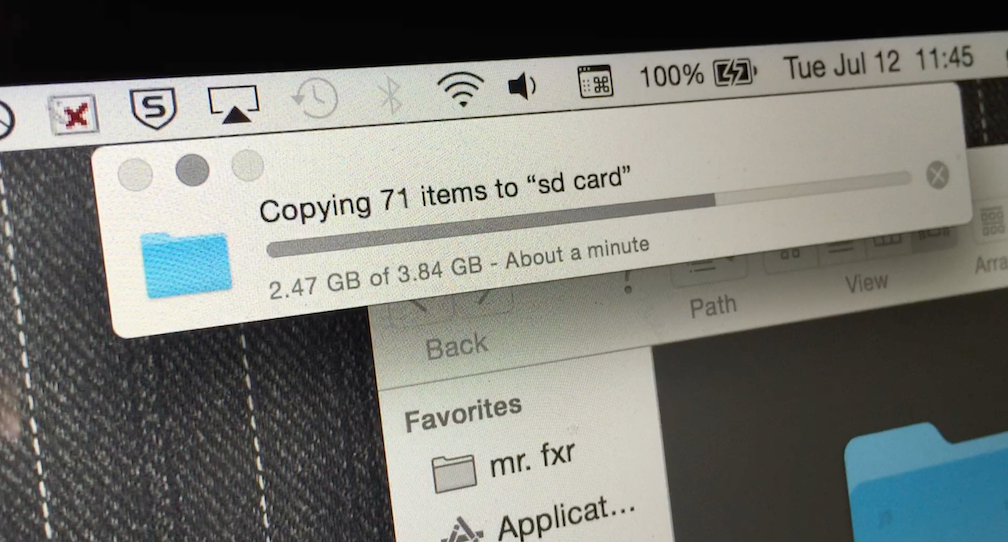
i plugged it back into the port and it recognized, but no information was accessible. dang! but i did not spend this much time to get thwarted at the last minute. i gently began to pull on the card as if to slowly remove it, but stopped after a small bit and the files showed up! quickly, i began to pull the files over to safety! success!