serving hattiesburg and the surrounding area.
(columbia, petal, purvis, sumrall, laurel, USM, jcjc, jones county, lamar county, forrest county)
serving hattiesburg and the surrounding area.
(columbia, petal, purvis, sumrall, laurel, USM, jcjc, jones county, lamar county, forrest county)
come with me on a macbook repair journey that ultimately was unsuccessful. and not due to a lack of trying.
yes, this a documentation of an unsuccessful mr. fxr repair attempt. and not due to a lack of trying. right here in hattiesburg, mississippi.
the board i was working on was off of a macbook pro a1502 820-4924-a. i was getting a green light that went to orange, but no fan spin.
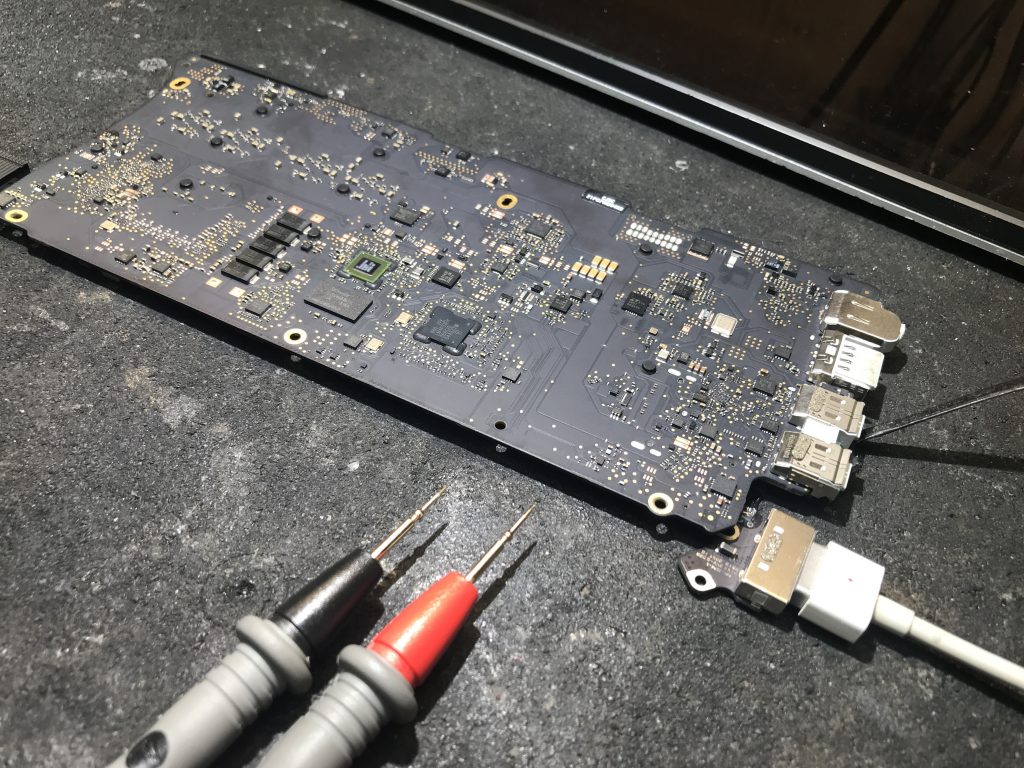
now if i can get this motherboard working again, i can take care of some minor details and have a great working macbook.
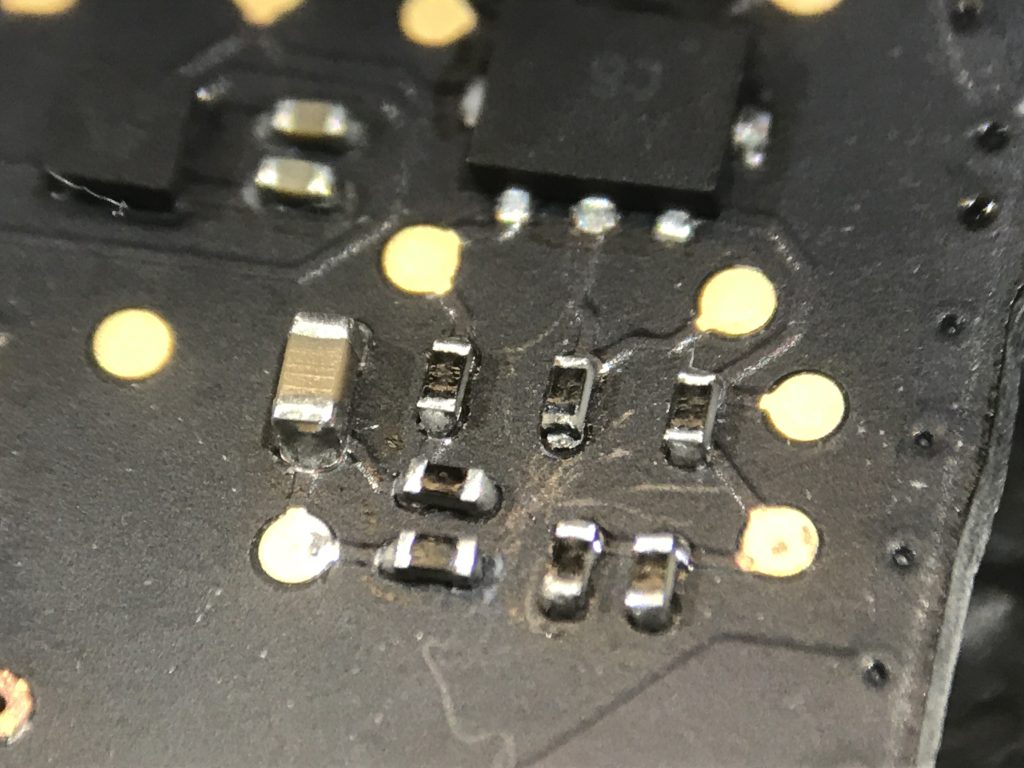
i didn’t see any real damage and began to look for some shorts on the motherboard. i first came across my CPU_VR_PH1 and PH2 rail looking shorted. i went to search for other documented repairs for this area to see what some possible solutions were and saw a post where the solution was to replace R8151. i looked it up on the boardview to find out where it was.
and sure enough, and big old ugly bunch of stuff that shouldn’t be there. i had not noticed it in my earlier cursory inspection. right near where the fan is located.
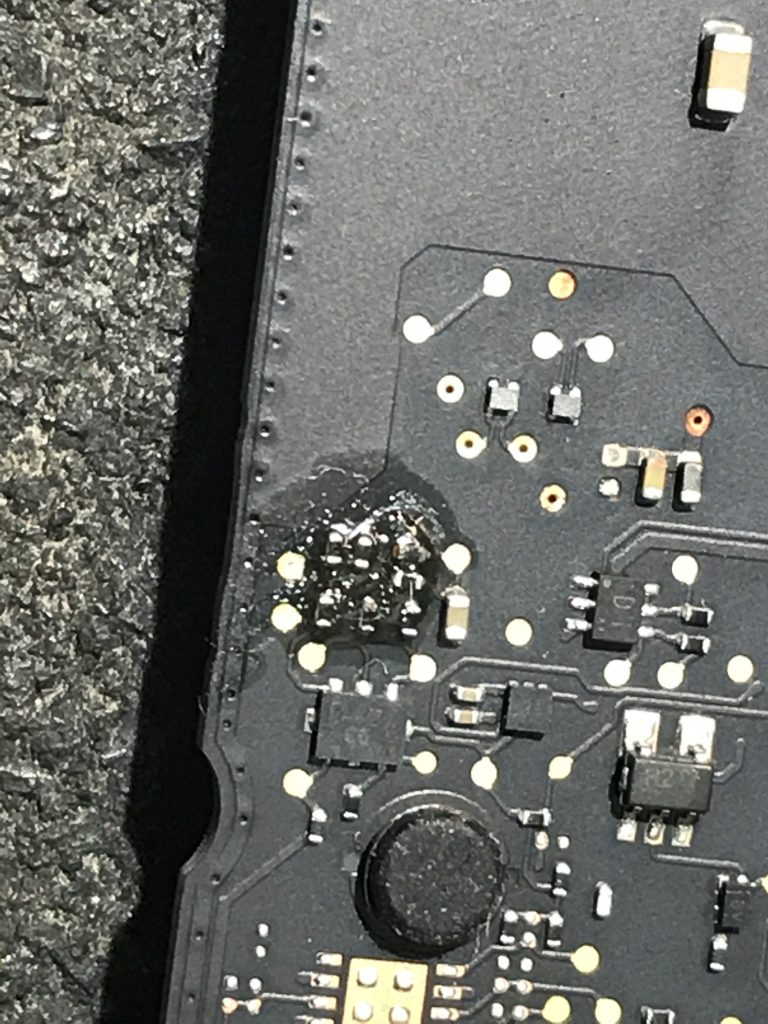
looking back on the boardview, i clicked on the resistor to see where it went and it went pretty far. R5181 is part of PP5V_SO which could very well be my problem and replacing those components could very well SOLVE my problem.

so i gather a parts board and pull off what i need and begin the process. after cleaning, most of the components seem to be ok, except for R8151 specifically pin 1 PP5V_SO. most of the solder on that end of the resistor had been corroded away.
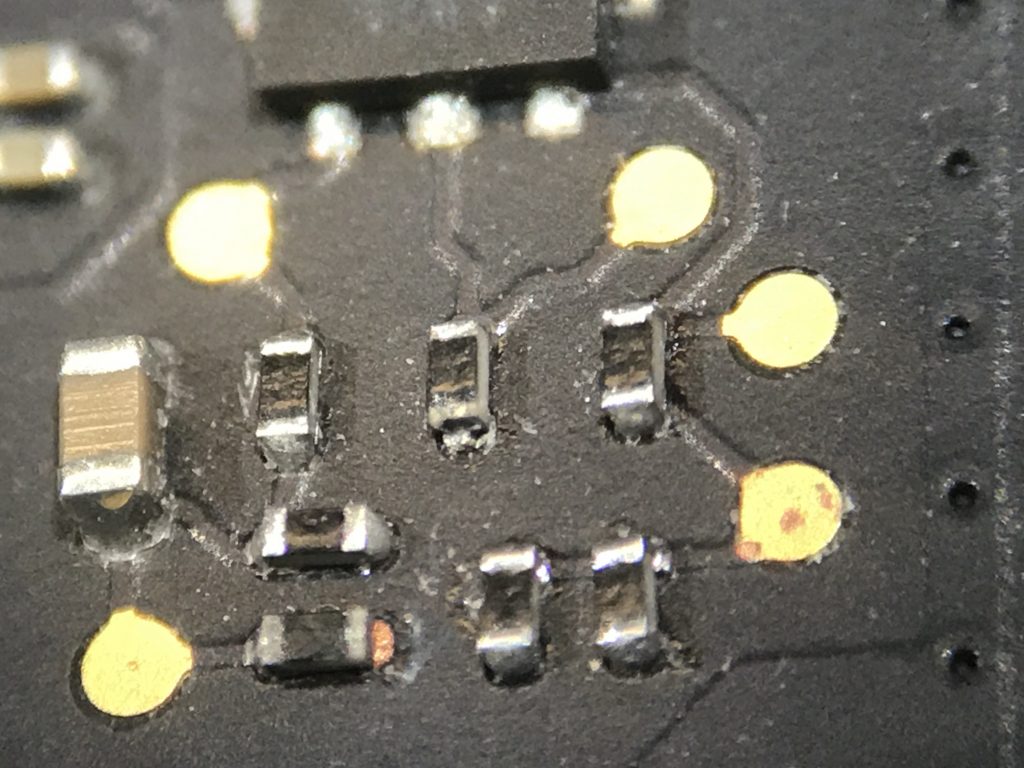
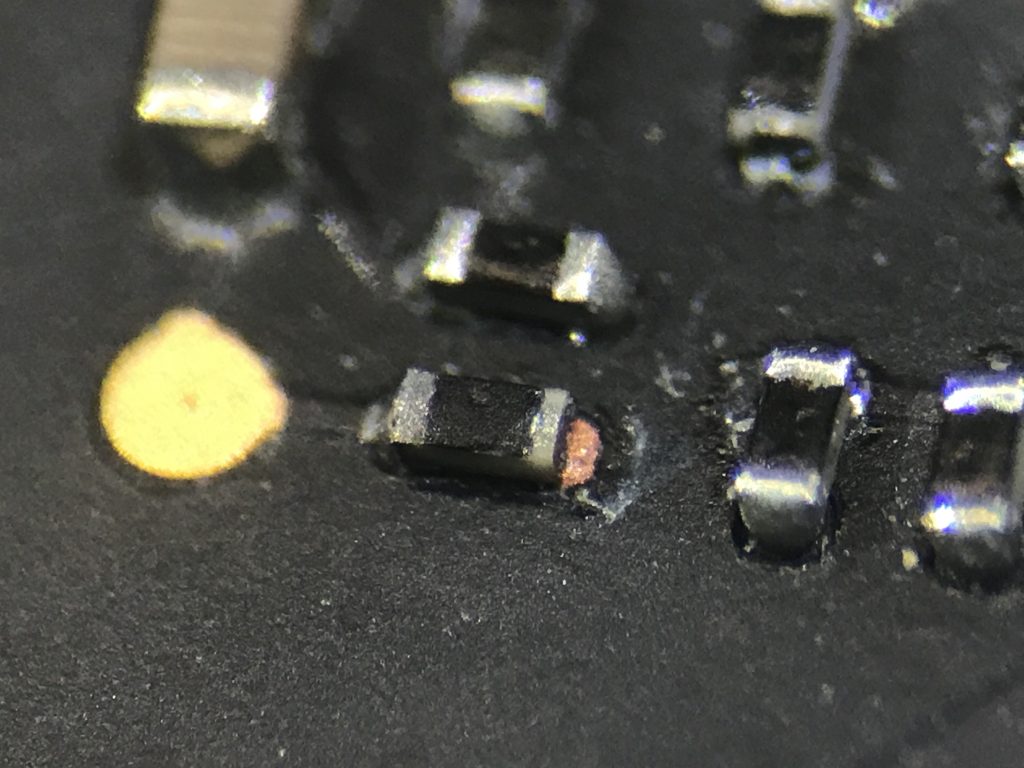
so i replace it with one from a donor board. 54.9k 1/20w 201
still not firing up…
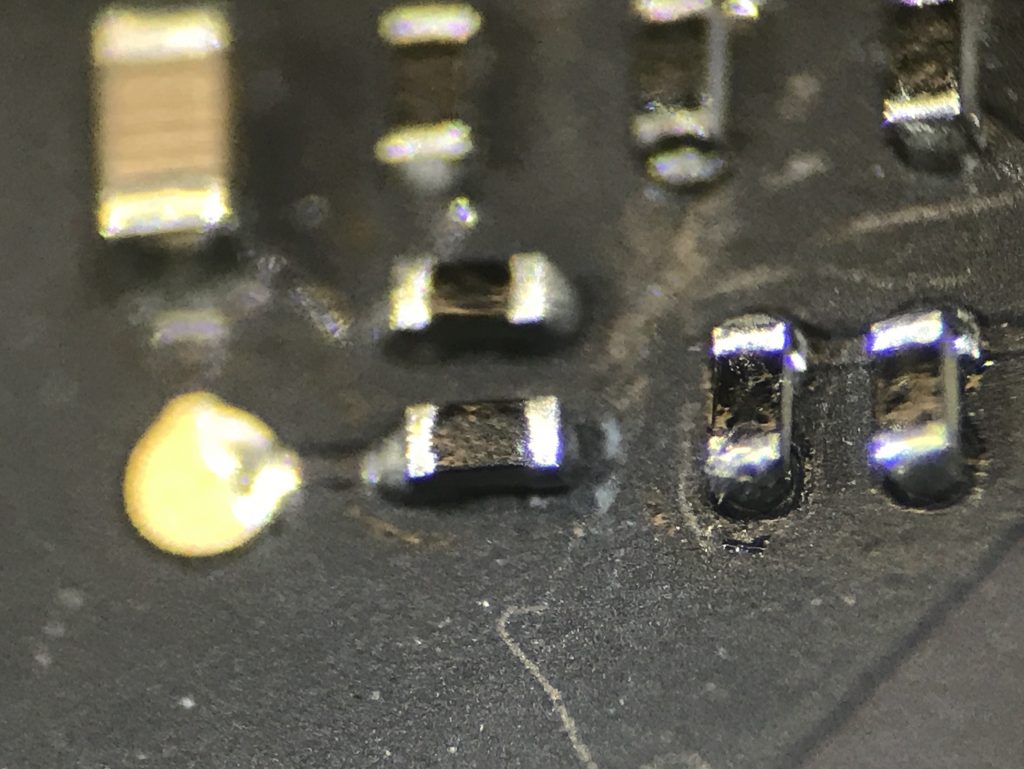
so digging a little deeper i come across a video from another tech who was chasing the same rabbit on the same trail that i was. so i decided to look over his shoulder and see just where he ended up. and…. it didn’t look good. all of the same components that he chased down were giving me the same problems as well. Q7310, Q7320 – Q7311,Q7321 – U7310, U7320 which is responsible for CPUVR_PHASE1 and CPUVR_PHASE2. PPVCC_SO_CPU all having trouble.
till ultimately we both end up near the CPU – R7310 and R7320. too near for comfort. with a resistor, we can’t tell which side the short is coming from. so standard practice is to pull the component and then you can tell.
well, nothing left to do, but pull the components.
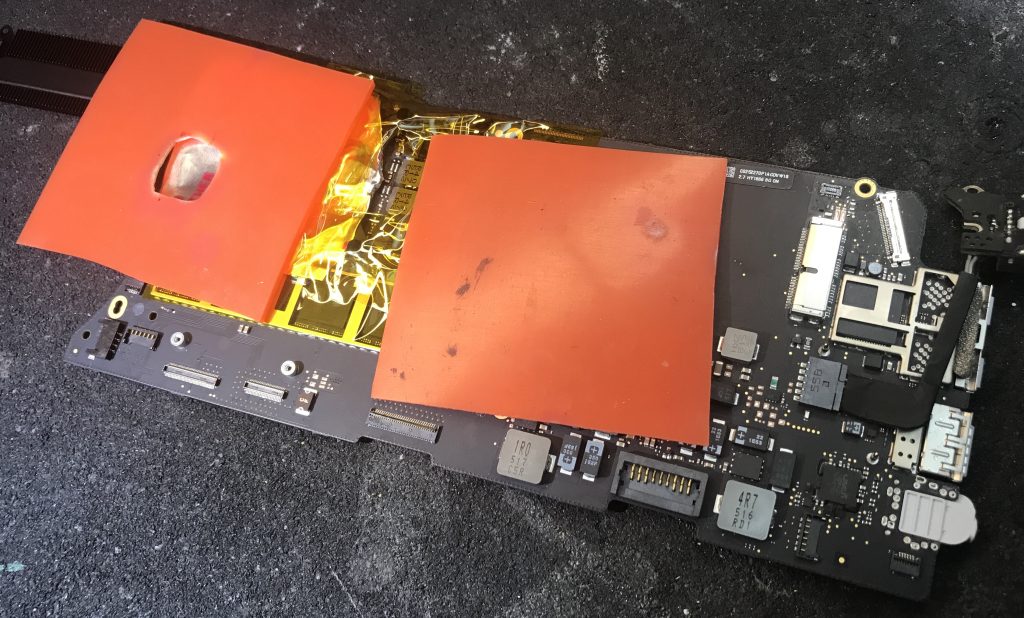
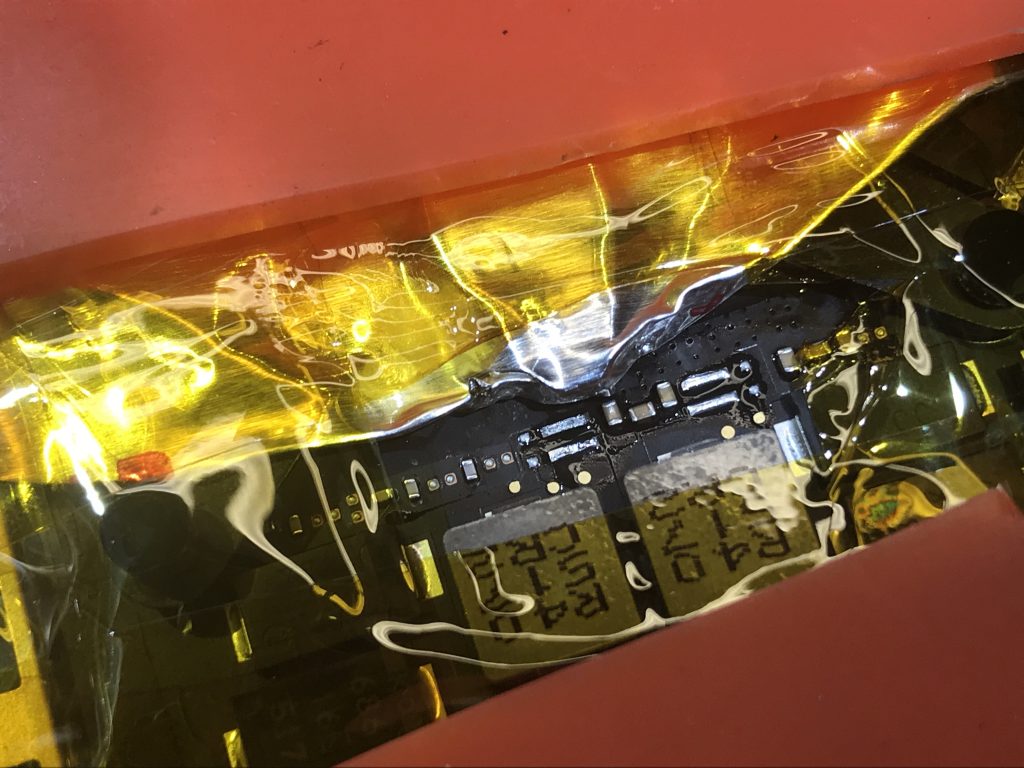
proper care is taken to try to protect he CPU and surrounding components as best i can. but those resistors are danger close to the CPU. i leave the heat sink on and cover with some aluminum, kapton tape and ultimately some silicone – all heat dissipating/shielding barriers.

before removing (above), after removing (below).
and now for the moment of truth. we need to test pin one of R7310 against ground to see if we continuity also known as a short to ground. if the pin beeps, the CPU is toast and i can move on.
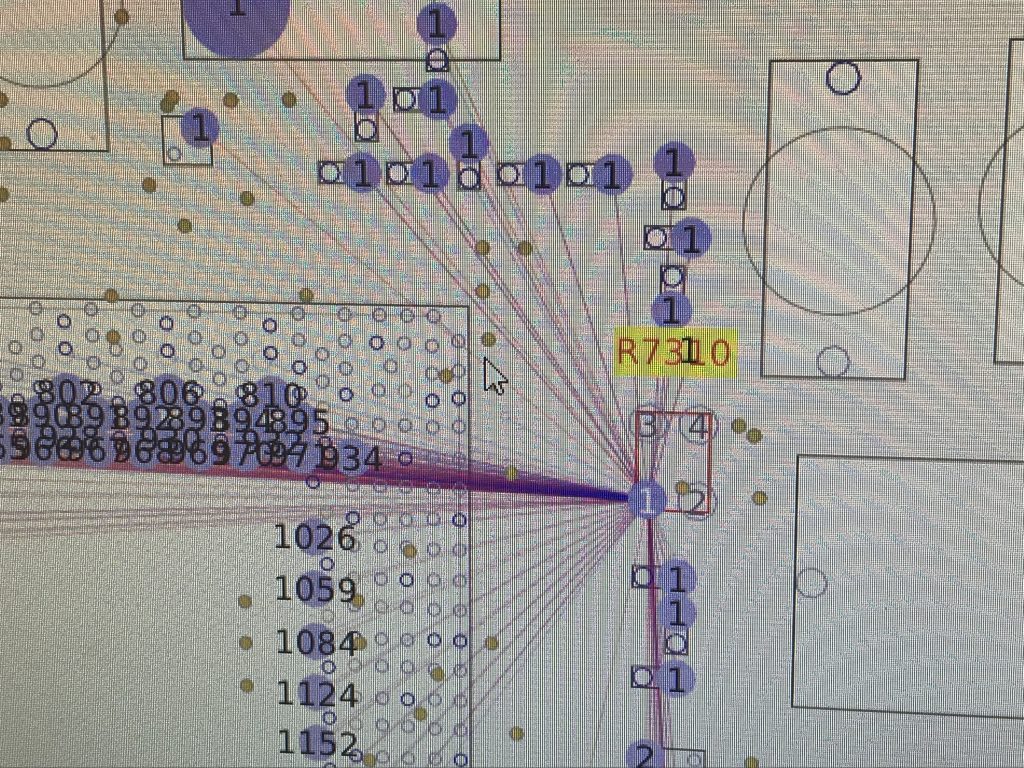
pin 1 of R7310 is all over the CPU and by removing R7310, we can then isolate which side the short is coming from. a shorted CPU means this board can be junked. sooooo, fingers crossed for no beep on the CPU side.
dang… SMH – so disappointing and especially after the successful focused work done at the beginning of the post. up and then down. i don’t like getting beat by the macbook. i want to defeat the damage and fix it!
and as an interesting PS:
i had another macbook motherboard that looked and acted very similar to the 820-4924-a, but this one was an 820-3536. and sure enough, i bypassed all the rigmarole i went through with the other board and went straight to the resistors near the CPU. removed them and sure enough – another shorted CPU… into the parts bin it went too.
ultimately somebody else’s work helped me diagnose my own problem and feel comfortable about finally putting this board to rest. hopefully, this post can also do the same with helping someone else to quickly diagnose their own problem with this board as well. if this blog post has been helpful, or if you have any comments, take a moment to post your thoughts below.

gracias estoy en la misma
Hi,
I’m having the same problem, same board.
CPU_VR_PH1 and PH2 rail looking shorted, lifting L7310 and L7320 (easyer than removing R7310 and R7320) the short is on the CPU side 🙁
Did you desloder and test C1031? I don’t have hot air, and the cap have two gound pins (one mid, under the cap) so it’s not that easy to desolder whitout hot air.
i don’t remember, but you should consider getting an air device if you are doing this – i use a really really cheap one – hot air is hot air. i have to test the temp with my multimeter to make sure i’m not too hot or not hot enough. you may also be able to glob on enough solder in a big glob to really soak with enough heat to remove it. i’ll have to look closer. maybe someone else will see this and comment.
I got it out, but it tested ok 🙁 so only thing left is the CPU (or one of the small decoupling caps, but I doubt it)