serving hattiesburg and the surrounding area.
(columbia, petal, purvis, sumrall, laurel, USM, jcjc, jones county, lamar county, forrest county)
serving hattiesburg and the surrounding area.
(columbia, petal, purvis, sumrall, laurel, USM, jcjc, jones county, lamar county, forrest county)
got a liquid damaged macbook in the shop (a1278 820-3115-b) that was given up for dead. was asked if i could take a look at it before turning it back over to the customer unfixed. it did not have any green/orange light and no fan spin. completely unresponsive.
let’s jump right into it.
after looking at the board, i noticed that c6994 around u6990 was corroded and the power rail PP3V42_G3H was absent.


so, that is a good start to the fix. pulled that off, cleaned it up and installed the new one.
still no power…
so, let’s look some more. did some testing around u6990 and found that the power seemed to stop there. so after a bit of deliberation, i decided to pull it off and see what changed. we taped it up really good (because it’s located right beside the ram slots) and applied what turned out to be a large amount of heat to get it off.

 the pink stuff is a heat resistant gel/foam and the yellow is a heat resistant tape. it’s really necessary as the u6990 has a large heat sink below it and you really have to put the heat to it. i mean really put it to it.
i pulled another from a donor board and mounted it, then tested it. still no green light. no fan. no power in that PP3V42_G3H rail. but what i did find was that every capacitor i tested around the area was grounded. so i looked up all the capacitors on the PP3V42_G3H rail and found they all were grounded. no need to replace them, as they were all probably good except for one. one that was grounded and had grounded out the whole power rail. but how to find it?
so i need to get some more advice online and began to search some relevant posts. and here is what i came up with.
[box] ok, so you have a short on the PP3V42_G3H bus somewhere. inject 3.42v on pin 2 of the inductor L6995, and go find what gets hot.[/box]
whaa?!!! kind of scary. basically i was being told to inject power into the rail and look for smoke – lol
so, let’s lift that inductor and put my power supply to it. i want to use my existing power supply clips as i was intending to turn the board around in my hands and didn’t want to create any more problems by just soldering a wire to it in case it flexed once too much and broke off. so i looked around for something thin and metal that i could solder to the board and what i would be able to hook my clip to. aha! let’s use this sewing pin.


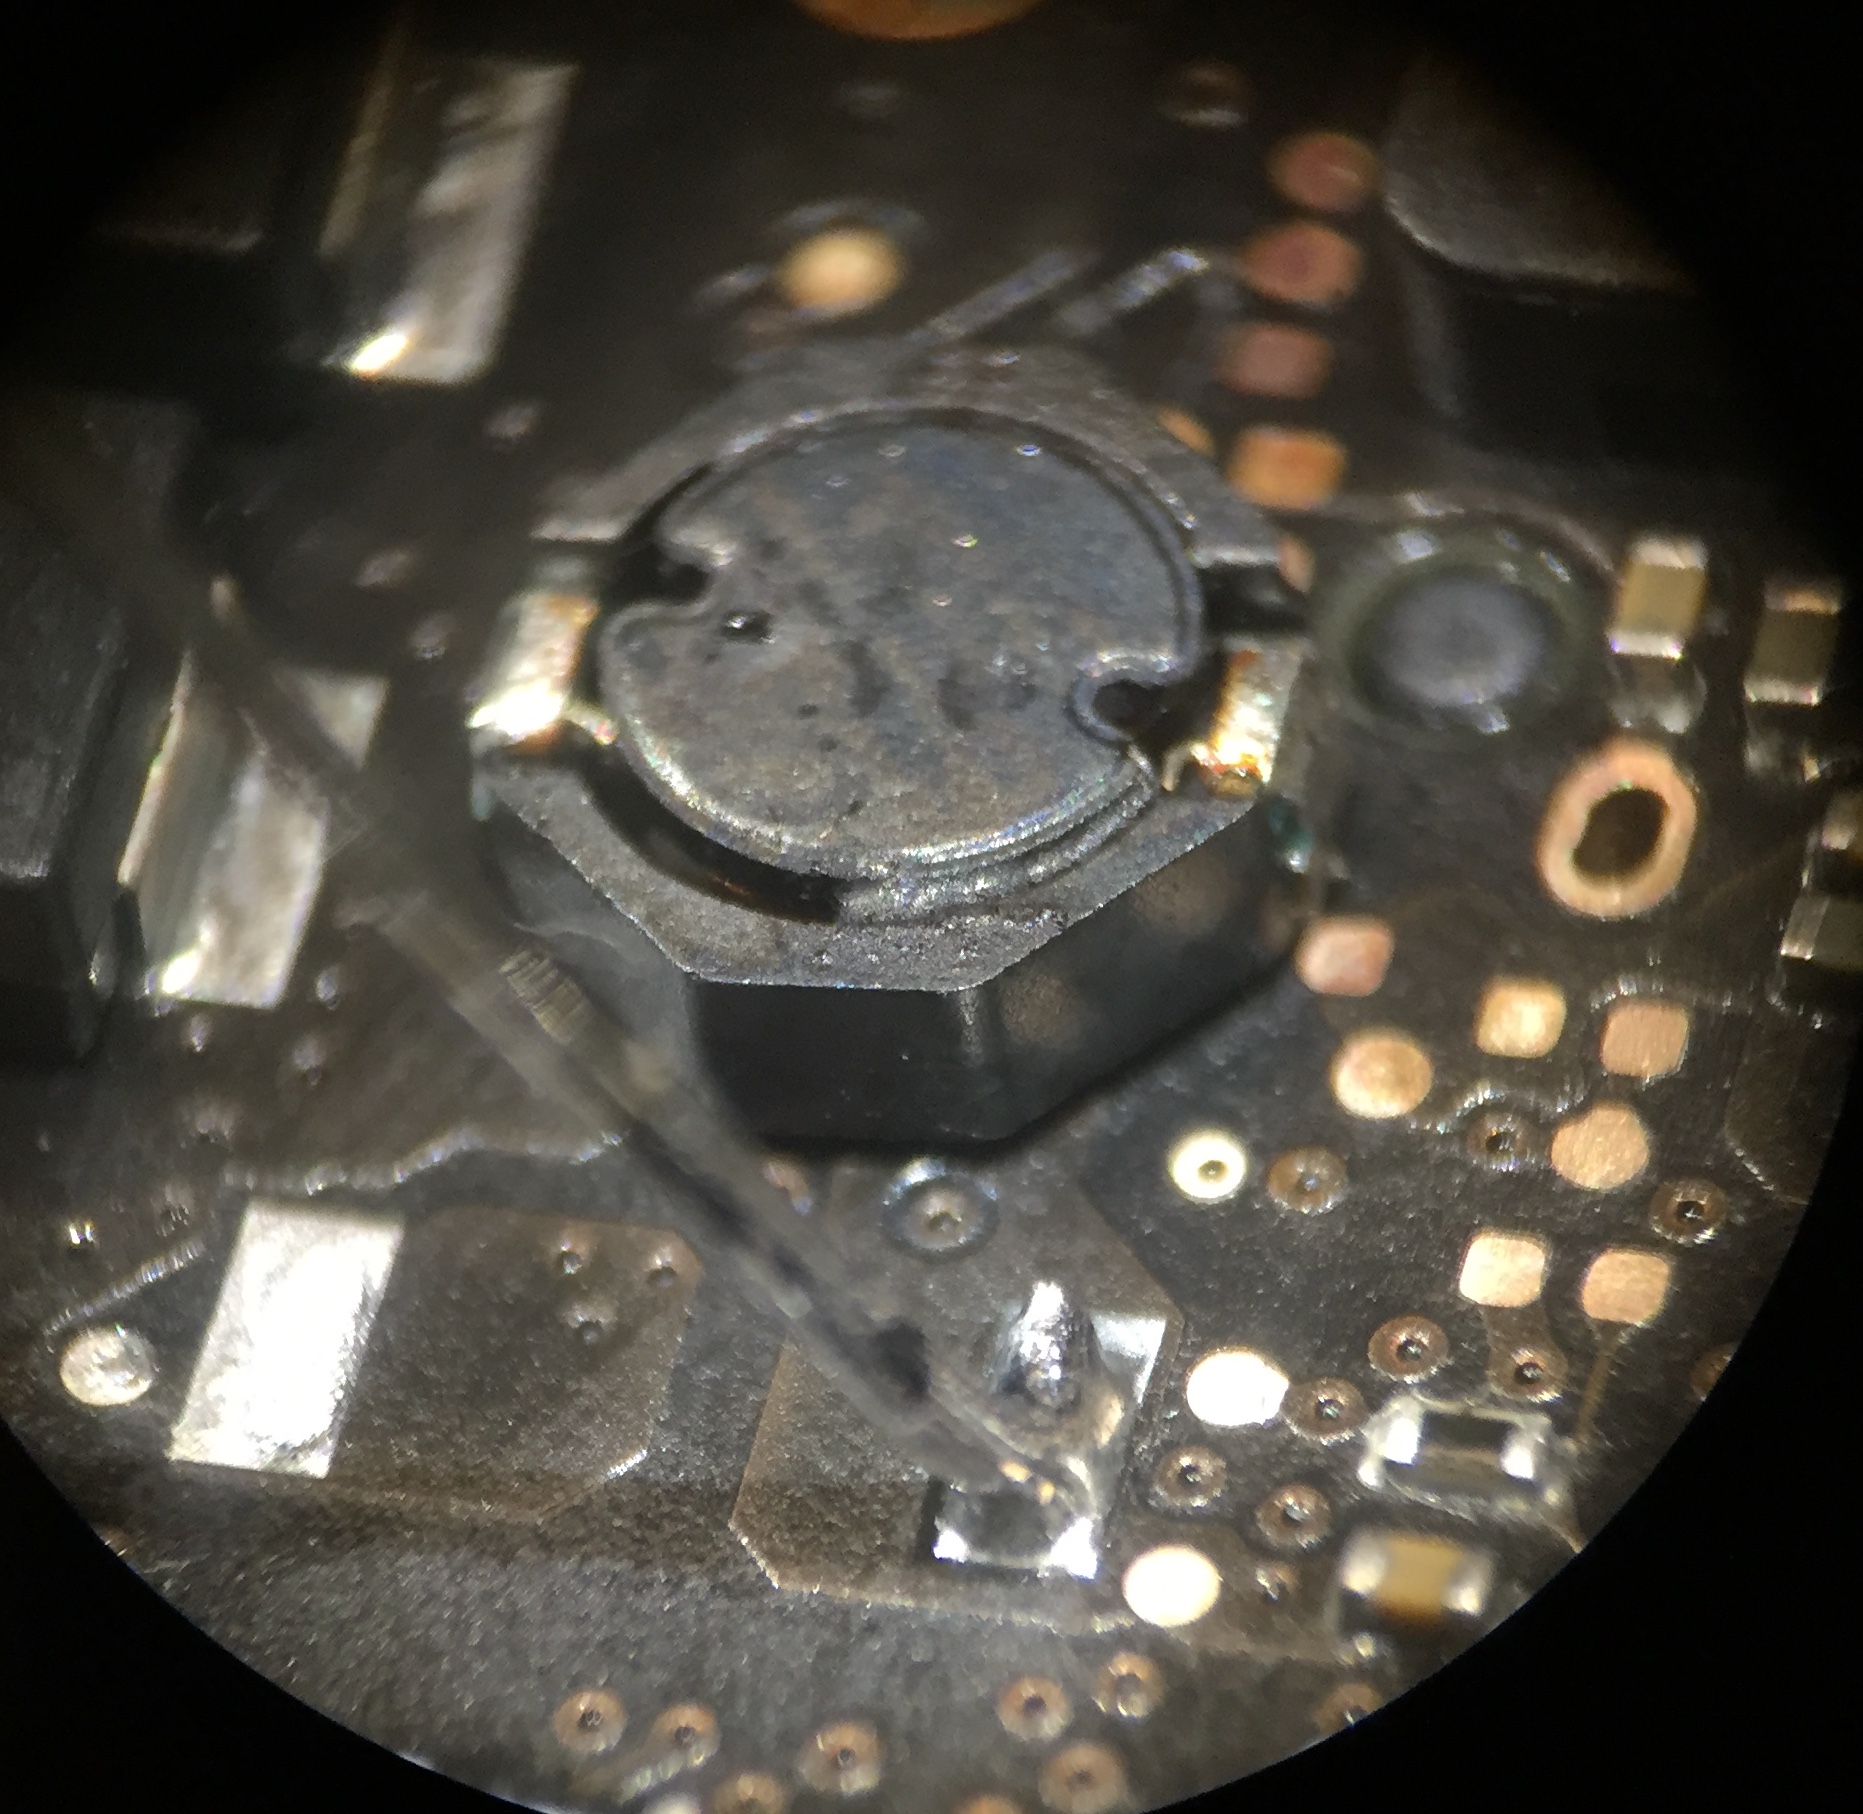
the photo above is a close up of the inductor beside it’s usual home that we have soldered the sewing pin to. let’s turn on the power supply. 3.4v @ 500 mA. i felt allllll over the board and did not feel a single hot spot. disappointing. so let’s turn up the power a bit and feel around some more.
ahhhhh!!! whoa, that’s hot! yes that area right there. right beneath the foam pad. in an area that was not directly related to the power rail that i was troubleshooting.

lets take a closer look.

yup, there’s some nasty there. let’s remove the foam. very very sticky, so going slow. i don’t want to rip anything and create more work than needed.


yeah, that’s some corrosion there. c6400 and c6405 and possibly r6405. let me pull off the bigger one and then test for short to ground.
i started with removing the bigger one – c6405. i lifted it, then retested the board. short to ground was gone! so i went ahead and removed the other corroded ones and replaced them from my donor board. but in the process, i noticed that a trace between the two capacitors had been corroded away, so that meant that i needed to create a new trace.


if you look close, you can see that half of the copper pad that the capacitor sits on is missing. and the trace between them was no longer sending a signal. so let’s put them back and reconnect them as they were intended.

are we done? let’s hook up the charger and see!
no green light, no fan spin. argh… wait, what’s that i hear? is that fan spin? yup, aaaaaaand green light!!

let’s put that board back into it’s place and restart it!
yes! it lives!

and it’s charging!

now, time to get it back to the customer. hope you enjoyed this journey down the diagnosis/fix path. if you like this kind of stuff, leave a comment.
lesson learned: liquids and sponges go together. maybe next time, first take a look under any sponges or areas that liquids would cling to. oh, and the pink stuff spatters quite a bit when using that much heat in that confined of a space. i may have exceeded it’s rating. lol. (by a couple hundred degrees F)

Very, very helpful post for people trying to troubleshoot their own problems. If only more people would take the time to help others, like you just did sir, this world would be a better place. Thanks for the post!
glad you enjoyed it! thanks for chiming in.