serving hattiesburg and the surrounding area.
(columbia, petal, purvis, sumrall, laurel, USM, jcjc, jones county, lamar county, forrest county)
serving hattiesburg and the surrounding area.
(columbia, petal, purvis, sumrall, laurel, USM, jcjc, jones county, lamar county, forrest county)
this week involved a very intense, focused, time sensitive forensic data recovery effort on a damaged flash drive to retrieve irreplaceable sensitive legal evidence pertaining to a mississippi investigation conducted by a large law enforcement agency that i will not name. the nature of the data was sensitive and that meant that the flash drive could not be out of sight of the investigator.
now i normally don’t let outsiders into the “bat cave” workshop. the nature of what i do sometimes involves a high degree of concentration. especially when maneuvering under the microscope. i’ve had people express their surprise when i’ve opened their phone in front of them about being able to do it while they are watching. but for the most part, i can do a normal repair in front of someone and carry on a conversation just fine. but micro soldering in front of someone is another matter.
if you have ever welded before, i’m sure you have heard “don’t forget to breath”. well, it’s the same thing with soldering something detailed. the intensity sometimes makes you hyperfocused. both activies involve a high degree of heat and making a mistake can happen.
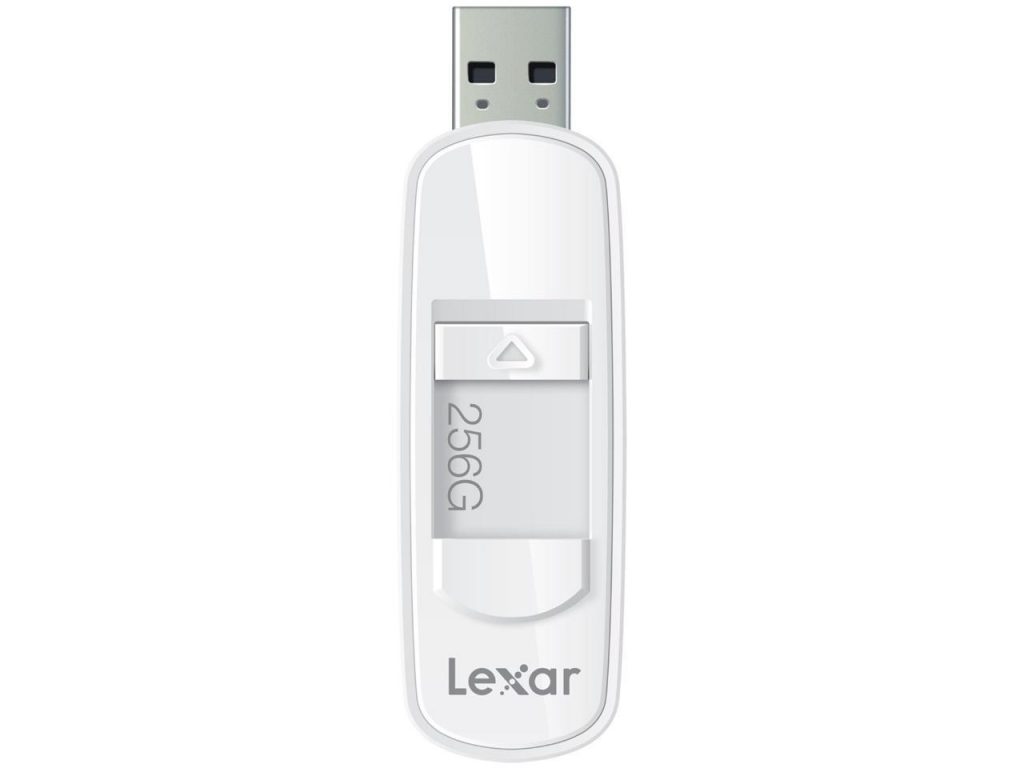
the flash drive was a lexar S75 USB3 with 256GB capacity. the investigator indicated that the flash drive had been bent and could no longer be accessed and that it contained some very crucial data. i got the gist that not only was it important, it was very important. this data had a chain of custody that would need to be maintained. he had brought his agency laptop, which was encrypted and used a series of passwords to access. and i really did not want to be involved in that chain of custody if at all possible. i did not want to have worry about being subpoenaed to testify at any possible future trial. as much as i like to maintain a certain barrier to my workshop, i like having to be involved in a trial even less. so i ultimately agreed to his conditions and invited him over to the shop.
at our initial consultation triage, i could not see any physical damage to the device. nothing that i would expect to see with a bent flash drive. and there isn’t a huge amount of real estate to examine. it’s very tiny. i could see a slight crease in the metal port that would be inserted into the computer’s USB port but that was it.
you can see the slight crease in the photo below – almost imperceptible.
this investigator had been doing his homework already, trying to find a solution and we were able to put our heads together about what we were looking at. he seemed to have a good grasp on the situation and what i was telling him made sense with what he had been studying. my initial gut reaction was that after viewing the crease in the head of the flash drive that maybe the damage was internal to the port of the drive and that a good solid connection with the computer’s port was not being made.
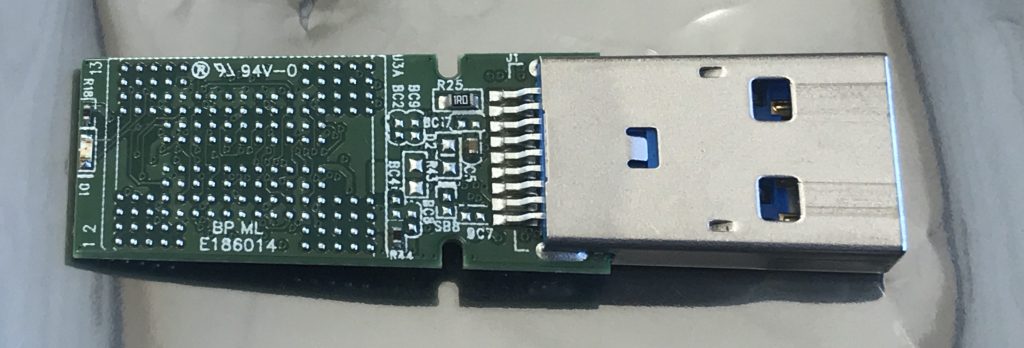
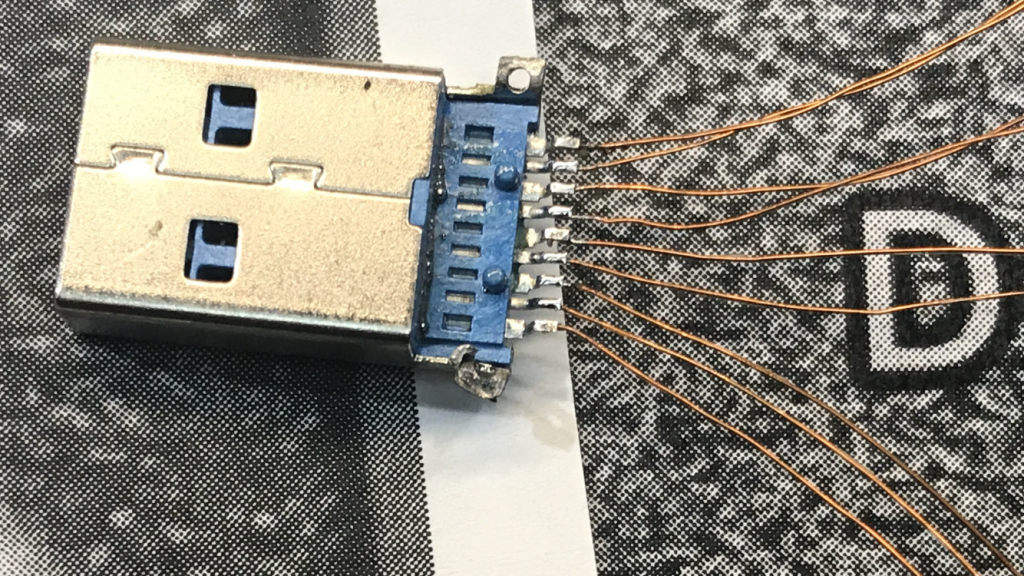
now, part of finding a solution to a problem is to not create additional problems that were not there to begin with. my dad always said to maybe try replacing the spark plugs before replacing the engine. so i felt that a good start to this solution would be to bypass the port on the flash drive. this process would mean attaching a new head to the flash drive past the point of damage. leave the damaged head attached, but jump into the pathway just behind it. that way, we haven’t really altered anything and we could bypass the damaged port. we purchased a new flash drive, removed the port and tested the pinouts of both the new port and the damaged port.
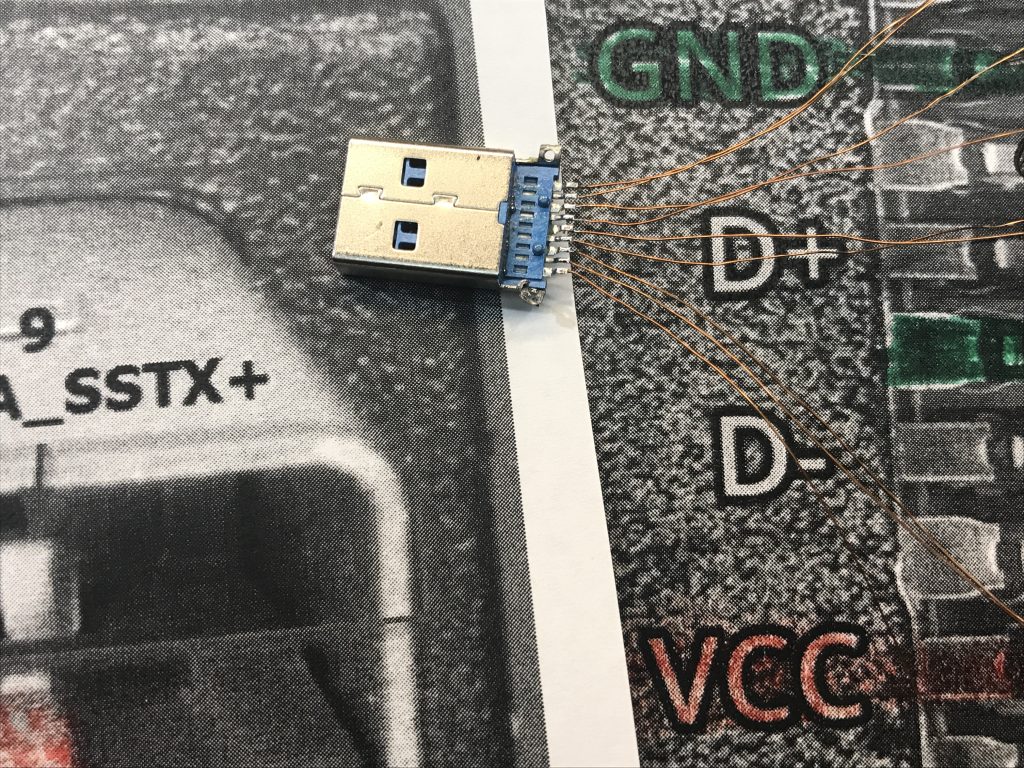
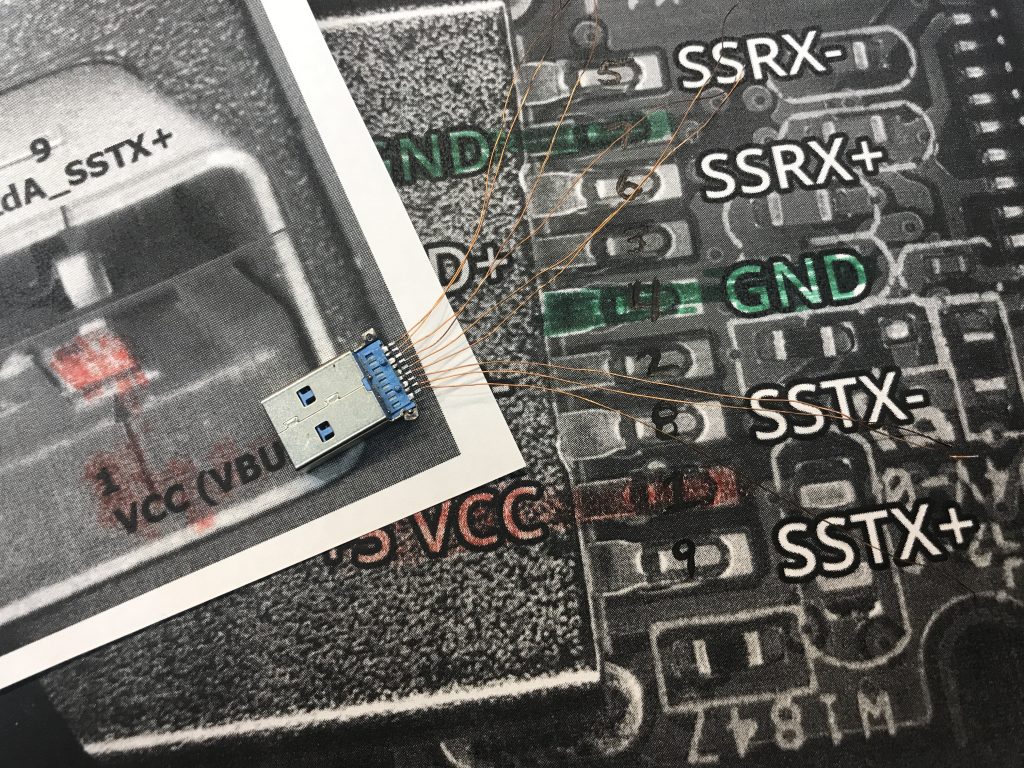
now a USB3 has 9 pinouts and there are at least 2 pinout versions that i became aware of. standard and non standard. and that didn’t mean that there couldn’t be others. sometimes these manufacturers can be tricky. i deal with a vendor whose parts are stamped with a snake-like letter “S” and have no identifying features and you can bet, the pinout is going to be non-standard.
after charting the pinouts (i kept getting lost), we came to the conclusion that the replacement USB head pinout was the same as the damaged out.
the preferred method to jumping in on the pathway, is to use a small wire to attached one pinout of the new head to the same pinout of the damaged one. magnet wire is used for this process. magnet wire is about as thin as a human hair, and looks bare, but actually is coated with a clear, very hard coating. this coating is non-conductive and very very hard to remove. you have to either burn it off or scrape it off – not very easy or fun.
after i made the connections, it was time to see if the bypass worked. i had high hopes as it seemed that the only damage was now going to be bypassed. he fired up his computer, entered in his login credentials and we plugged in the hard drive…..
nothing. no light, nothing showing up. this was late in the day and i indicated that we should try again the next day. in the meantime, i would do some research on the subject now that i was more familiar with what i was dealing with. he had to be in jackson at his headquarters in the morning so we made an arrangement to pickup where we left off the next afternoon. he took his drive and we called it a day.
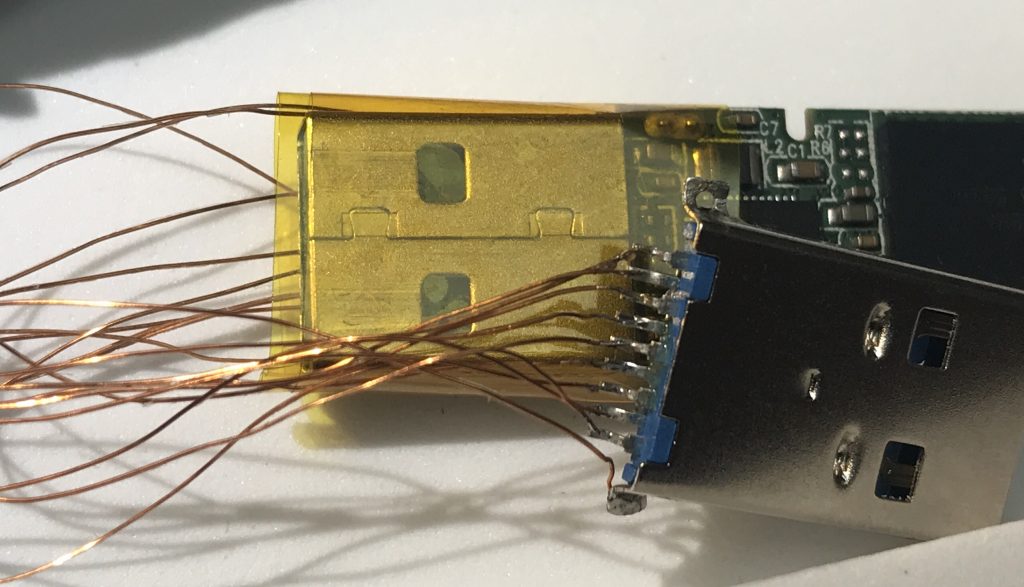
the next day, i picked up a new flash drive and redid all the things i had done the day before. started fresh with new head, new wires – reviewed the pinouts and got ready for when he arrived to quickly reconnect the second head to the old drive. i had slept on the problem, and woke to a fresh day with new hope for a fresh attempt. when he arrived, i went through the process, with a slight change. in the first attempt, i did not connect the head frame to ground. the frame is usually soldered into the motherboard and that solder point is attached to ground. and with a 9pin USB3 there are 2 grounds. GND and GND_DRAIN. so i made the connection and we made our 2nd attempt to light up the drive…
nothing again…
disappointed, i felt that we had to look deeper into the path of the drive. i felt confident we had effectively bypassed the bent head (the seemingly obvious choice to fix first), so our problem must surely be deeper. we changed the sparkplugs, so now it was time to dig a little deeper.
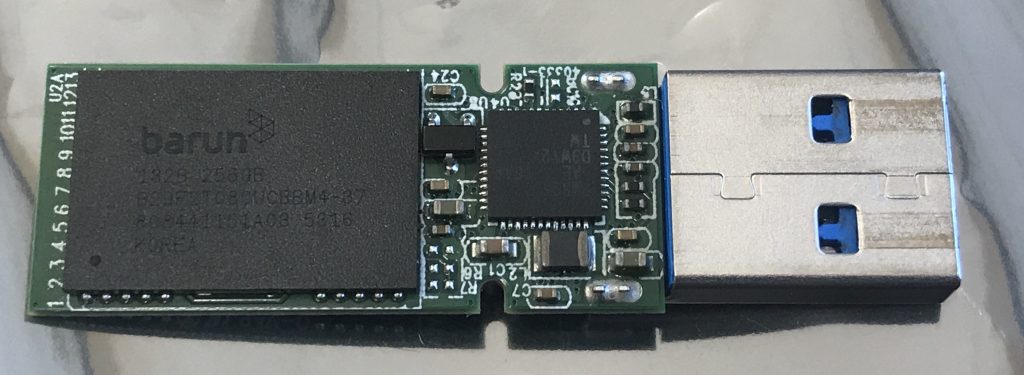
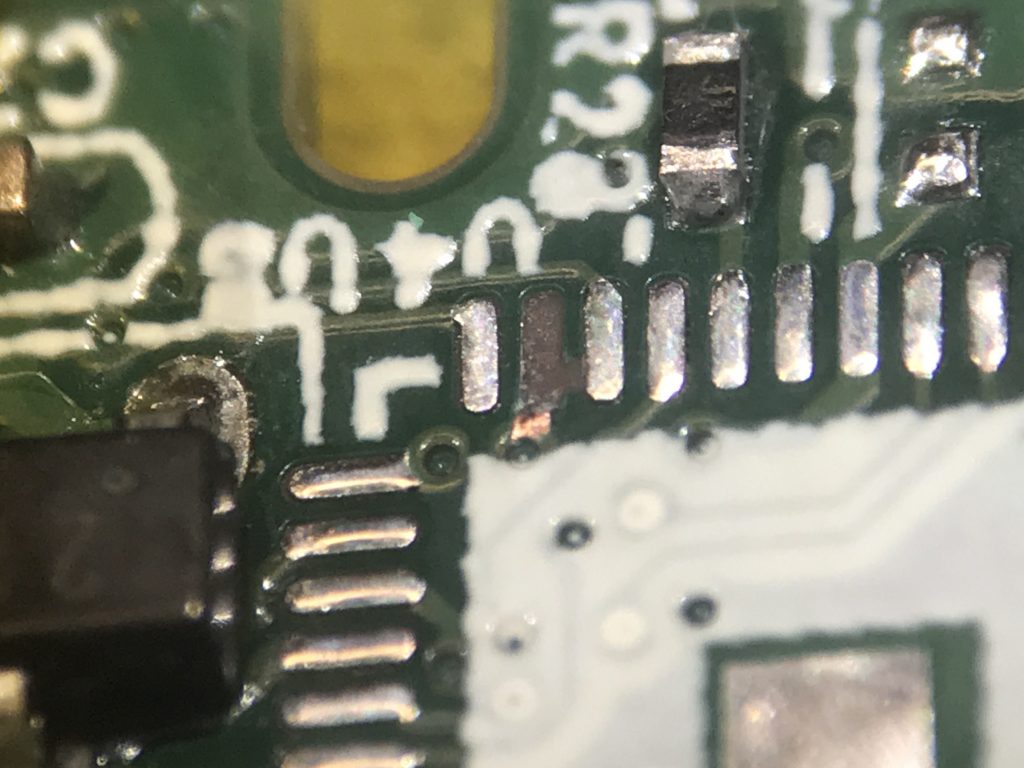
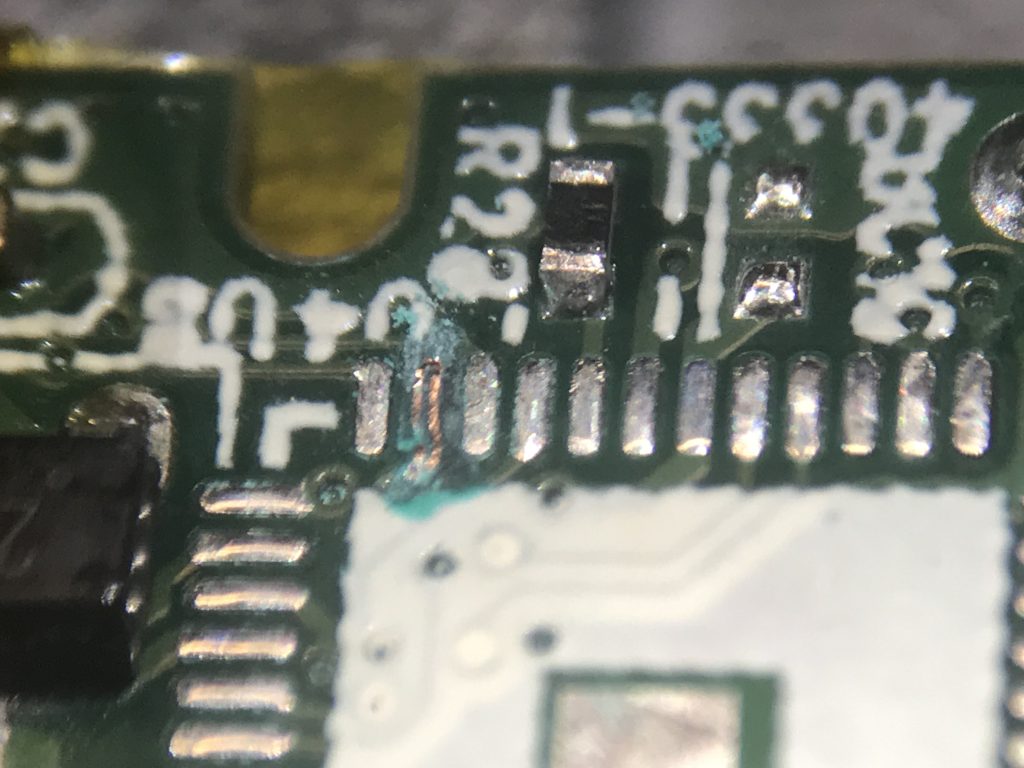
i got the drive back under the microscope, removed all the traces that i had applied from the new head to this drive, and began to take a close look. i took a small pry tool and began to probe different points on the drive. the drive was protected with a coating. all the components looked like they lay underneath a layer of clear plastic paint. so it was possible that the components solder may have been loosened, but held in place by the coating. the BGA data chip seemed solid and was the furthest point away from the area of the bend. all of the resistors, capacitors and gate looked solid. so i next focused on the controller chip. this was a 48 pin chip and when i placed my tool on it, i could see the chip move ever so slightly.
AHA!!!! i could see a break in the pad connection on one side and the side nearby, one of the pads looked lifted.


soo, i had a conversation with the investigator that we had moved past changing the spark plugs and were at a crucial point of the repair. we could either send this off to one of my guru’s or we could continue, but we were getting into a part of the job that made me nervous. not a big deal when lifting chips for a motherboard repair, but somehow seems different to me when soooo much is on the line. i made sure to let him know that this was a significant elevation in the nature of the repair process.
not knowing what was on the drive, i could only imagine just how important this data could mean to other people. not only this investigator, but the people involved in the investigation. could this data mean the difference in a killer getting set free for lack of evidence that was contained in this drive? how many man hours of work by law enforcement did this tiny piece of silicon represent? talk about pressure – whew…
he indicated that we should proceed with my efforts, so i began to get set up for the next process. i shielded the areas that did not need any heat and turned on the hot air and lifted the controller chip. the side that had the lift actually looked like a row of cold joints – not fully flowed solder and the pad that looked lifted was torn away.
so first things first. let’s take a closer look at that pad. let’s see if it actually goes anywhere, or a dummy pad. and upon closer inspection, it actually went to a board via. a via is a circular opening in the board that is a path (via) to the other side. i scraped away the green mask to expose the copper underneath. a point where i could attach the new pad i would be making.
the method used is to use some uncoated copper wire. very similar in diameter to the magnet wire we used before, but this wire is uncoated. we need the copper exposed to make a great connection. i personally just use a small piece of solder wick. i cut off a small length, then separate out a small strand to use.

i solder one end to the exposed copper from the via and double the other side over where the pad used to be. once satisfied, i then apply some resin to secure the new makeshift pad in place, cure it, then scrape away the excess to expose the copper, then tin it with some solder.
now time to clean up the chip, apple new solder to both the chip and pads with my iron then clean both and get ready to apply some hot air. once the chip is oriented and properly seated, i touch up the area with my iron, applying just a little more solder to ensure the connection.
ok – is the 3rd time charm?
nope… still no flashing light.
i take the drive back under the microscope and touch up some traces just in case without any change. dang… i really did not want to do a chipoff swap (scary!). in fact, i had consulted with a data recovery guru i respect that does this more regularly and he indicated that he is doing less and less chipoff and more repair of the drive like i had been doing.
i’m not done just yet – this thing is really pushing back hard, so i’m going to press on. i’ve done the necessary legwork, and this should be opening up but isn’t. and in a short time, i jump back to where we first started. i’m going to put back on the wiring harness bypass that i started with. maybe now that the pad was replaced, the chip fully seated – we were back to the original problem of the bent head. so the bypass harness gets reapplied.
i have a USB extension and the harness is not the most durable contraption when it is moved. so to cut down on any possible flex, i press the new harness head into a USB extension cable and get ready to plug the other end of the cable into the computer.
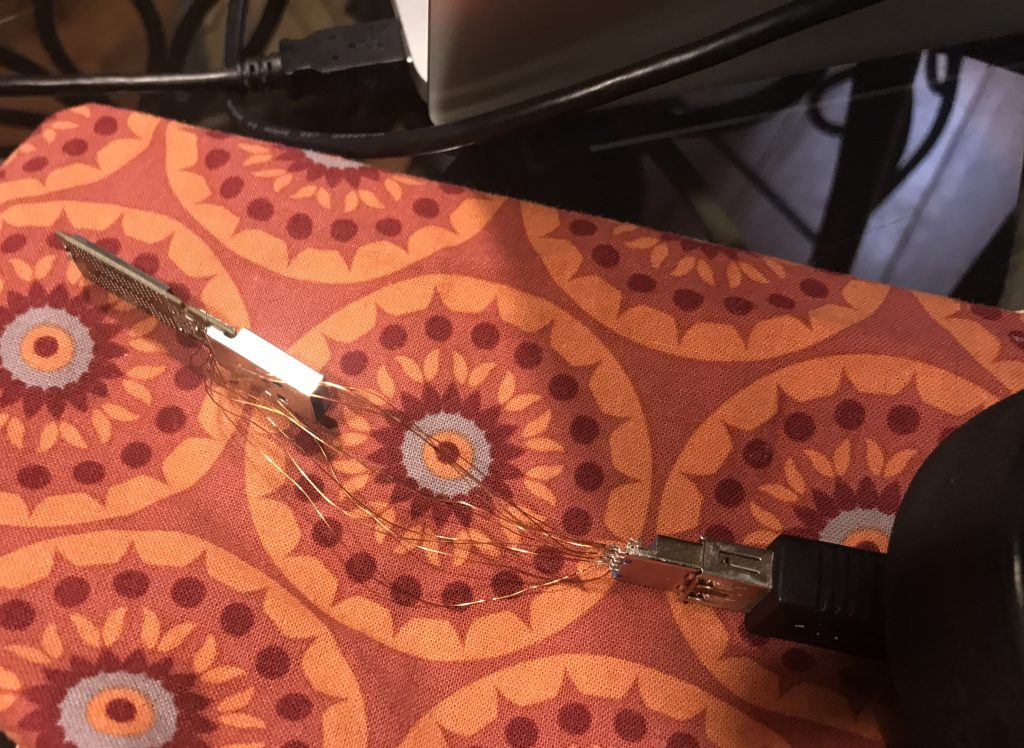
and we have a light!!! the computer starts to recognize the drive and we get our first veiled peak into the upper folder names of the drive.
now i don’t know if this had anything to do with the final success of the recovery, but it may have played a part and worth noting. the USB cable i used was a USB2 – and the data transfer was extremely slow. we had several interruptions, but were able to pick back up where it left off. and fortunately, the entire 256GB drive was nowhere near filled. but data using a USB2 straw is extremely slow. but maybe that helped with the solution. the data was exiting the 9pin USB3 drive, funneled into the 4pin USB2 extension cable and back into the 9pin USB3 computer port. did this make a difference in the recovery? i think so. because at one point when the drive ejected, i pulled the cable off and connected the bypass harness right into the computer port directly. i was hoping to speed up the process by using the full USB3 data transfer speeds. but when i did, i did not get a sign of a connection, and so i replugged it back into the USB extension cable and was back to a flow of data. so i think it played some part somehow. one thing i have learned is that you need to have known good equipment, but i’ve seen things get pulled just by switching things up that were not recognized prior. switch up computers – mac to pc, pc to mac, mac to mac, try all ports, different cables, etc. and find that one port in one computer will give you what you need in many cases. not to give up with one cable in one port on one computer. weird, but has worked for me in the past and worked for me again. plus it’s hard for me to give up.
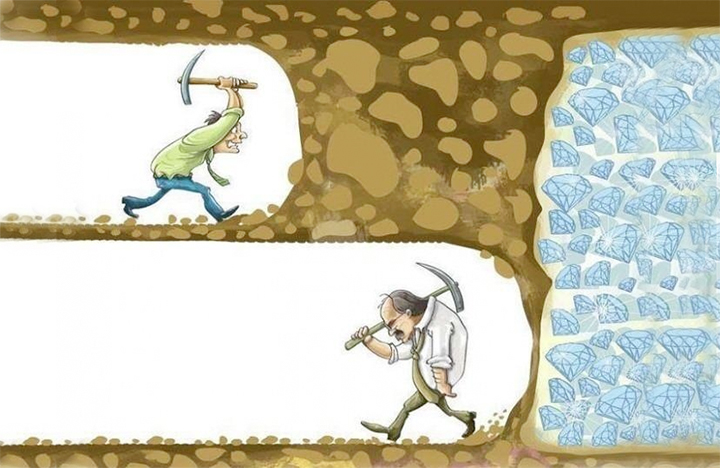
a lot of times, it’s just that one thing that separates you from your goals and by pressing on, not giving up, you can achieve them. a buddy of mine once said your strengths can also be your weakness and your weakness, also your strength. i think that giving up is one of those things that make me successful, but also there are times that i labor over something that i should have given up on long ago. but this time, my weakness was actually a strength and helped me to find a solution. a solution that i hope has helped others. maybe some who are looking for answers that the information on this flash drive can provide. ultimately, i would like to be filled in on some details once things finally take their course and the data has served it’s purpose. if i find out and get permission to tell you as well, i will make an updated post. until then, keep on keeping on!
thanks for riding along with me on this particular story in my repair journey. if you have any comments, please leave it below. if you have a flash drive that is damaged and you need help to recover your data, please contact me here with your details and we will have a consultation and help to find you a solution.

Wow
Awesome !
O my…..I heard someone who read your blog say…”I am not that smart!” Very talented and such precise work and attention to detail. I would trust you working on the Space Program!
Wow!
Proud of you!!
I use to work as an AT&T technician….and understood some of this…but some was above my job experience. Excellent…So proud of You!