serving hattiesburg and the surrounding area.
(columbia, petal, purvis, sumrall, laurel, USM, jcjc, jones county, lamar county, forrest county)
was this macbook air toast?! (see what i did there - get it - toast... i crack myself up).
the burning smell of this macbook air was intense. definitely not faint. this smelled like a serious problem. electrical burning. let’s fix it! right here in hattiesburg!
when the account initially contacted me about this, i asked them if the smell was more electrical or was lithium detected. leaking lithium batteries have a distinct odor. and can be dangerous. it could indicated that a possible violent venting is possible. the account indicated that they just needed me to take a closer look.
the lithium used in batteries is the same lithium used for the treatment of bipolar disorder.
my initial thoughts and experience have been that a burning smell is usually related to a short that is caused by components that have been exposed to some kind of liquid.
the account had opened it to do a brief visual inspection and remarked that there didn’t appear to be any liquid damage and after i got eyes on it, came to the same conclusion, but the motherboard had not been removed to view the other side. many times, only one side will have been exposed, but usually there is some indication that there has been exposure. a splash nearby, wet keyboard, etc. so far, this computer looked in perfect condition.
after pulling the board (820-00165-a), i visually could not find the first bit of damage. no liquid, nothing corroded, nothing burnt. this computer, for all intents and purposes, visually appeared to be in perfect condition. the owner had taken good care of this device. not dropped (no dented corners), relatively clean, not very dusty (as we have documented on several other blog posts here and here). a very good computer. just didn’t run and smelled like a burned electrical device. (macbook air model a1466 early 2015)
which brings us to one of the only clues that we had to begin with, the burning smell.
the odor emanated from the center of the board on one side. very near the processor. but visually, the area did not exhibit any visual clues. even under the microscope. no high heat solder balls, no corrosion, no burnt looking components.
so let’s move on to the next step and plug in the charger.
whoa – the electrical smell is back – strong.
i’m going to go off on a tangent for a moment. but, believe it or not, one of the ways to find a strong short to ground is to actually touch the motherboard. i know that many of you have been so ingrained with working on electronic equipment making sure the tech is fully grounded. using grounding pads, no carpet, grounding bracelets, avoiding anything that could cause a static electricity discharge. and that is good practice. a computer tech, wearing a sweater while working in a heated, dry wintertime environment that has carpeting is a trigger for most of us that work on electronics. i bet some of you that just read that prior sentence had their eye start twitching. here’s the thing. no amount of static electricity can compare to a full on ~18.5 volt short to ground. no comparison. you have nothing to lose when the board is shorting to ground. i fully believe that you could shuffle your slippered feet across that dry carpeting and full on spark a motherboard and not even come close. if you feel otherwise, i welcome your comments below. let’s have a discussion. some of you would be appalled if you actually saw how some of the boards that go through cleaning are handled – but that would be based on faulty knowledge. we actually fully immerse boards in heated surfactants – good liquids used to clean bad liquid damage. mind you they are properly pH balanced formulas in the proper ratios of product to DI water, and these solutions are designed for cleaning electronics and by very smart people. and once cleaned and the damaged components restored, the now cleaned device will function as intended, as good as before the damage occurred. even after having gone through the cleaning process. i’ve done it over and over again. and i’m not a pioneer. people in my circle also do these procedures over and over. it was scary when i first started doing it, but after getting consistent positive results, has been quite rewarding. i like giving new life to damaged devices.
back to the repair.
i run my fingertips over the area the smell is emanating from and burn my finger. whoa!!! that is HOT! but which one of the grouped components burned me? they are all so close together, i can’t quite tell which one it was. i have to touch it again. and then again. till i finally narrow it down.
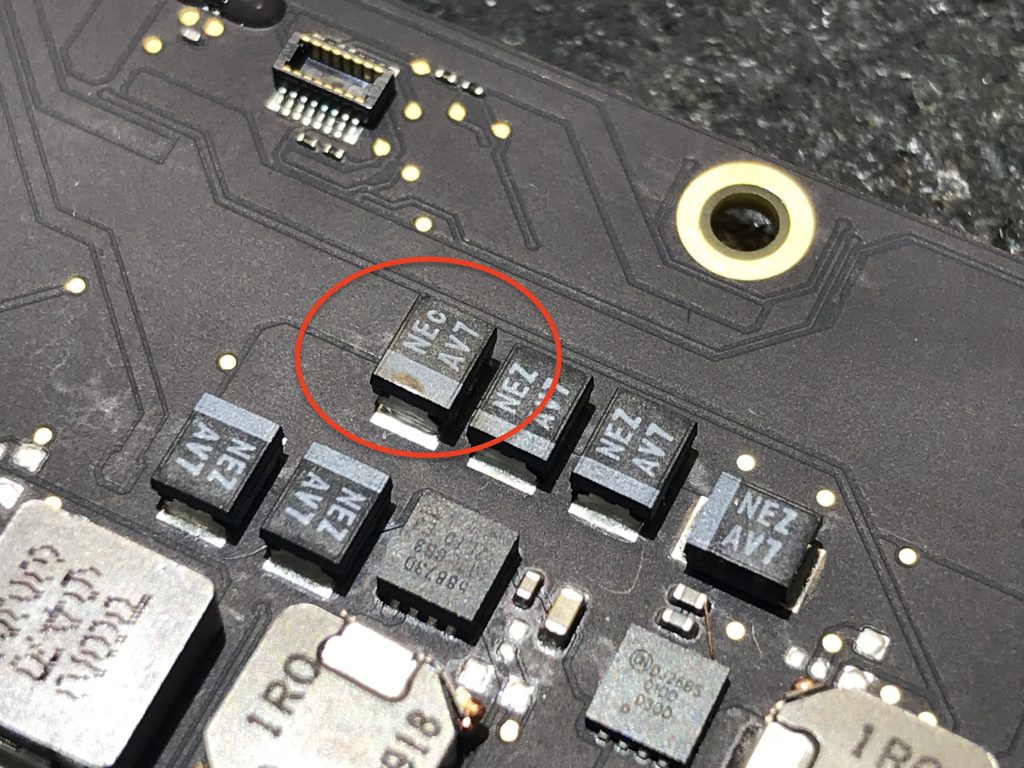
and it’s a capacitor. a tantalum capacitor. C7430. polymer 62uf 11v .023ohm. one side is connected to ground, the other side is connected to PPBUS_S5_HS_COMPUTING_ISNS.
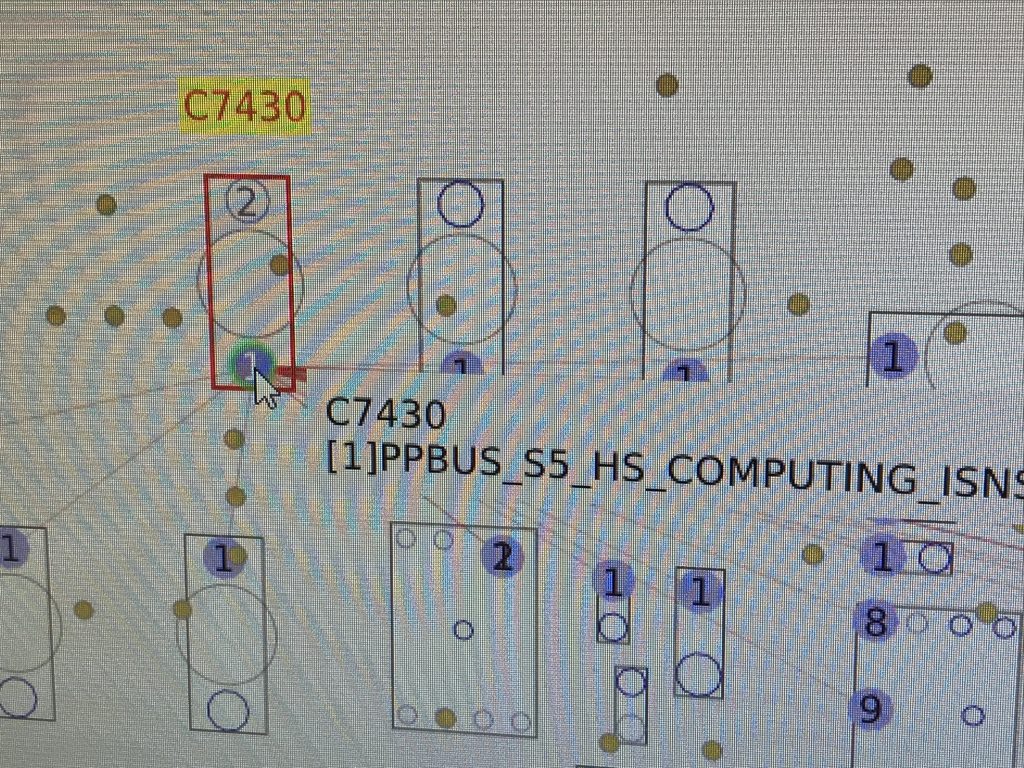
“the fact that it is blown could indicate a voltage spike on this line or it could have been affected by a lot of heat, or just be bad.”
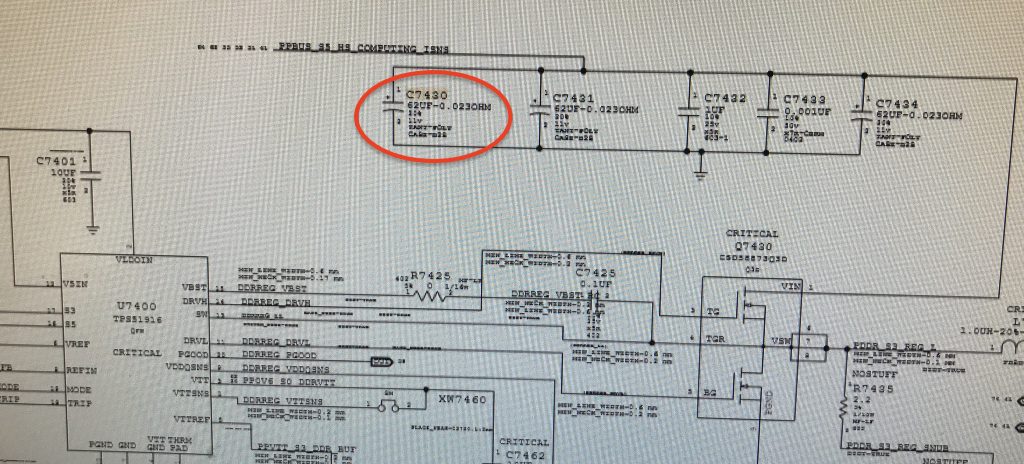
this capacitor was now shorted to that ground and heating up so hot, it could blister you if given enough time (which would be quick). yes, a short to ground can get very hot. at times, very little heat is observed, and then we have to use other techniques to expose the short. you can click the prior link and this one to follow that line of diagnosis. fortunately, we didn’t have to go that direction. this was “screaming” at us.
on a side note – from my research with louis rossmann, he tell of the massive headache that came from being exposed to a leaking tantalum capacitor. fortunately for me, this had not yet leaked.
so let’s get that component removed.

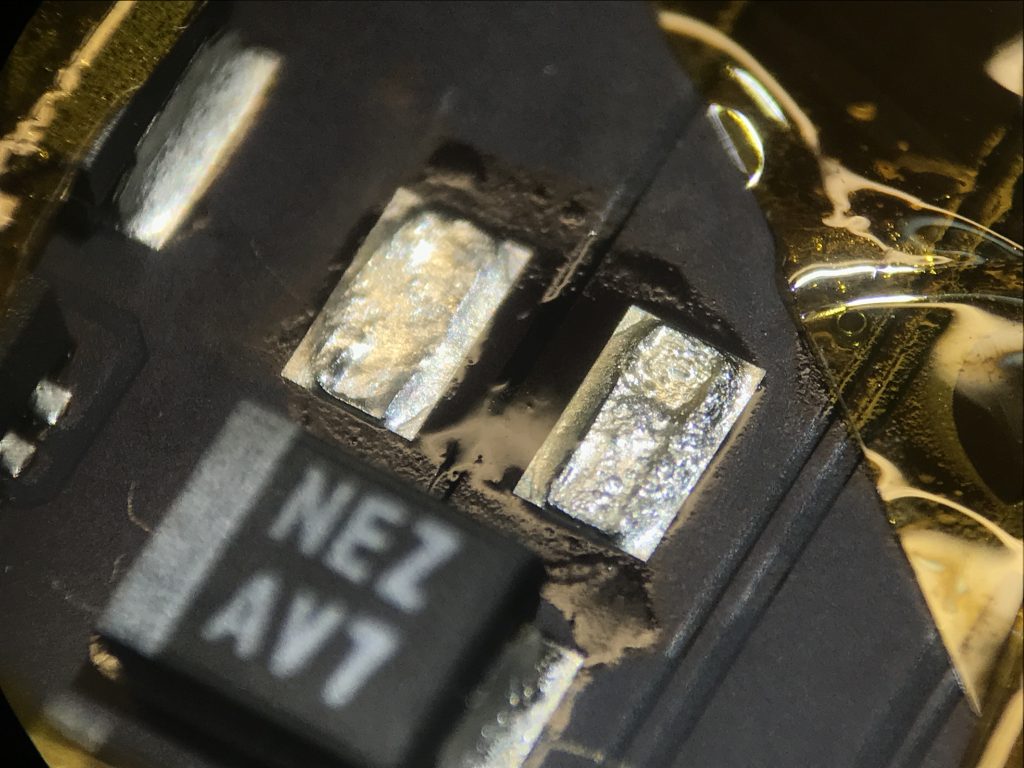
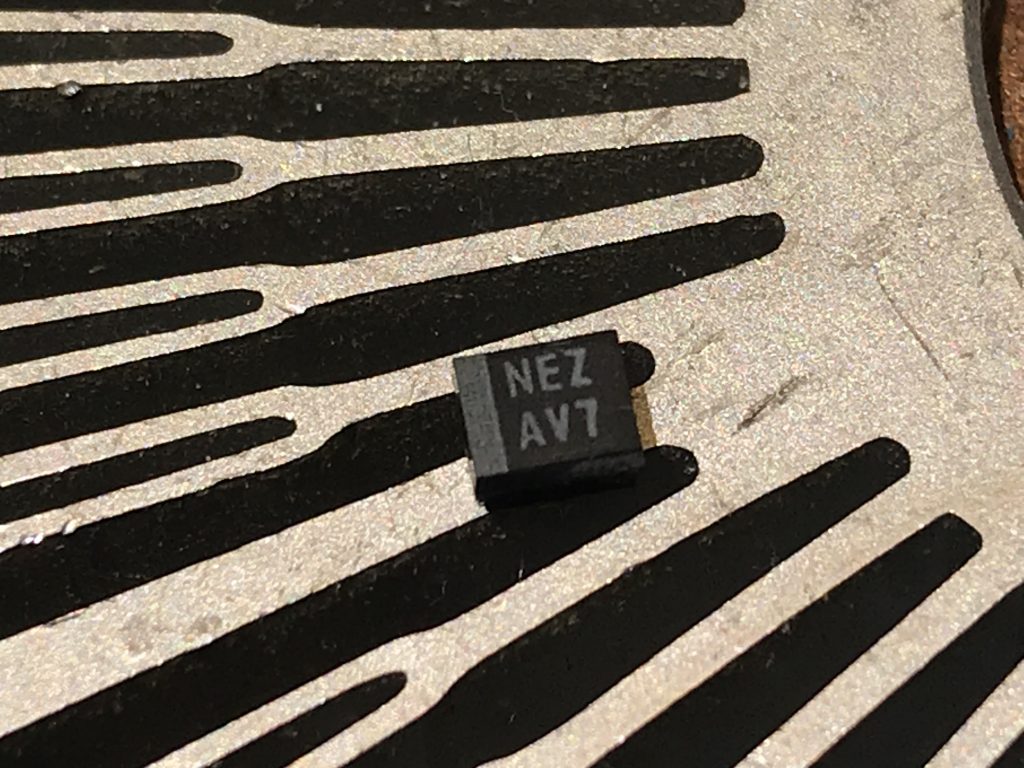
now let’s see if the short on the motherboard has been lifted and if the capacitor is shorted. i will use a multimeter to see. if shorted, the meter will beep. normally it should not beep, but if blown, we will hear a beep. a beep means we have found our problem (or one of them).
and yes – the capacitor is shorted and the ground on the motherboard has been lifted. i am betting that once this component is replaced, we will have a fixed motherboard. fortunately i have a donor board in stock and we harvest the component from the donor board and mount it to our customer’s board. let’s see if we get some life now.
yes! we get fan spin and green/orange light on our charger. let’s put this board back into the computer and see what it looks like!
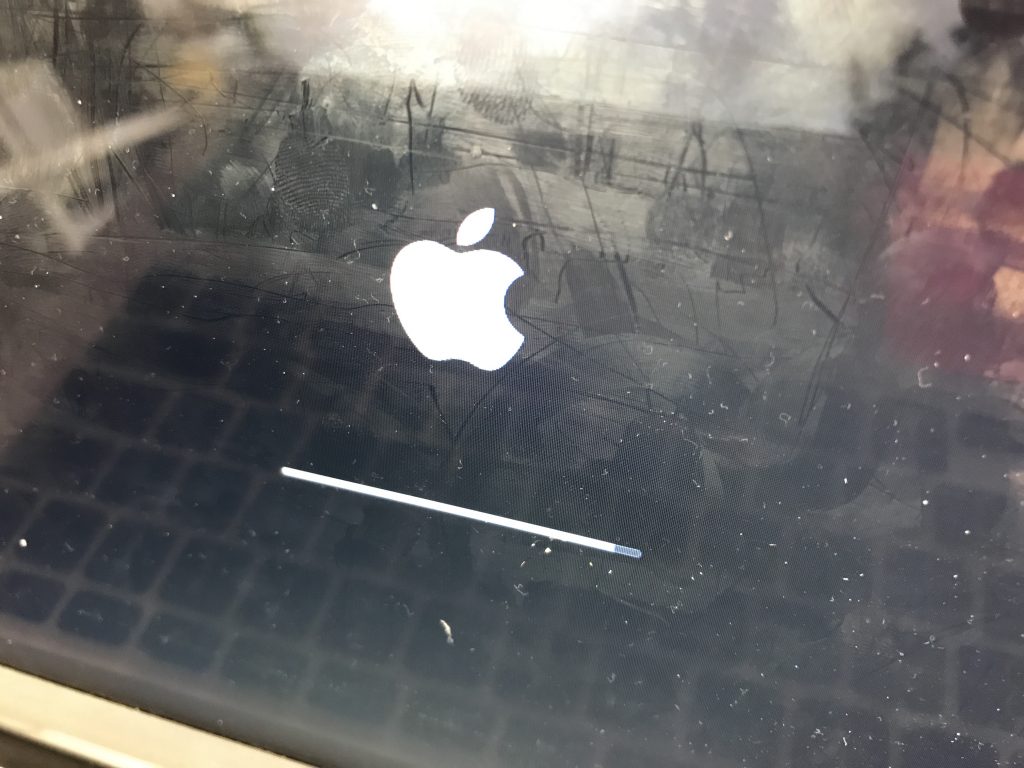
booting! let’s stamp this macbook air fixed!
as an final thought – even though some aspects of this repair can seem easy (as i’m writing this after the repair is finished), for many people it is not. certainly it is easier to view a path to the finish after the race has been run.
“hindsight is 20/20”
it’s easy to “call” this repair after it has been fixed. but this repair did not seem easy to me when it first landed in my lap. very bad burning smell that no electronic device should have, much less an expensive, highly sensitive, and valuable electronic device such as an apple macbook. no visual clues, only my nose and eventually touch. and even though my part cost to repair this may not be high compared to the fee paid to complete this repair, what is being paid for is the skill to determine which part is damaged and what to replace and how to replace it. part cost alone cannot be the only factor considered when a repair is contracted. skill and experience is also being provided. the skill to know what components are damaged, how to source replacement components, source them in a timely manner, what temperature and tools are used to replace the component without damaging nearby components, the investment into the various tools and supplies used to provide this solution, etc. a lot of time has went into experience. i have certainly paid my share of “stupid tax” over the years. i can’t tell you how many times i’ve labored over what component is the actual one needing work. the solution to a repair is not always readily apparent. and sometimes if a tech is not careful, they can actually create more problems for themselves that were not there to begin with.
i said all that to say that i feel that the prices i quote are fair for what is being provided. and if you need a quote on a device, please contact me and leave a brief description of your concern and i will get back to you.
thanks for joining me on this repair story!
Hey! How much time did you have the MacBook plugged-in to feel the heat on this capacitor? I’m having the same problem with exactly the same board, but the smell after 10 seconds is scaring, and I can’t feel any warm, even touching them with my fingers. Greetings from Argentina, and sorry about my poor English!
hey nico! i’m not sure – probably for awhile – i would leave it plugged in, whatever is going to heat up is going to heat up. if you are getting a burning smell, it should (logically) be hot enough to feel. if you remove the heat sink, may be under heat sink, but have to limit time on (don’t want to burn the processor). post an update if you get any forward momentum. any contributions may help others. also test some capacitors for short to ground. or any chip that is connected to ground. once you find the short, you can determine the path that is shorted and feel around on each component in that path. if no heat detected, look under microscope for tell tale signals. cracks, solder balls busting out, signs of heat or excess spikes. do you have access to the schematics and boardview? this would also help finding the path quite a bit.